DIY home projects
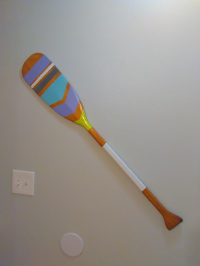
Wooden oar / paddle makeover
* This post may contain affiliate links.
I picked up this wooden oar at a flea market for $5! I was so excited. Being we live near to Lake Michigan, I knew I was going to be decorating our home in a lake cottage feel, so this oar was speaking to me. But it was so boring. Plain. Wood. And if you saw the before of our wood paneled living room you know how I feel about too much wood.... :) Ok, back to this project

My oar before.
It was a little dirty and I had a hard time getting the price sticker off. So I made this side the back.
You will need:
Acrylic paint
Foam paint brush
Masking tape
wooden oar
First, choose what type of design you want. Stripes? Big stripes? Little stripes? Thick stripes? Angles? You can play around with your design with your tape. And trust me, once you start taping off your sections you will move tape and move it again.

Once you have it all taped off like you want, paint it. Just paint in between the tape lines. Don't paint on too thick. If it doesn't cover very well, wait for it to dry completely and then do another coat.
You can remove the tape carefully while the paint is still a bit wet, but be careful not to pull off your tape into the paint and mess up your lines. Otherwise, wait for this beauty to dry and remove the tape.
Admire your work!


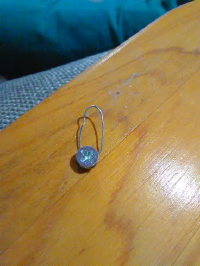
Take a short screw and screw it into the back of your oar. Where will depend on how you plan to hang it. Screw it in far enough so that it's tight, but not coming through the front of the oar. Then take some wire and wrap it around the screw a few turns, then leave out a loop for hanging, then wrap it tight around the screw a few more times to secure the wire and loop. Then hang it!
do it
CrazyDIYmom.com Contact Us Privacy Policy Disclaimer About me