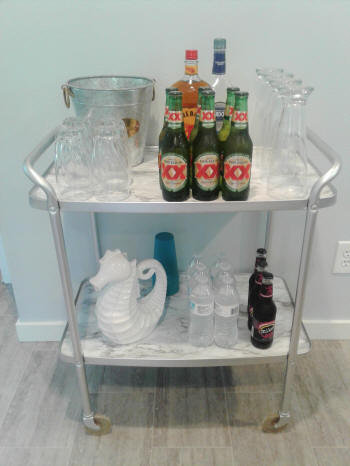
DIY bar cart makeover
This post may contain affiliate links.
I love bar carts. I would have a bar cart in every room of my house if I could. You can use them for so many different purposes, not just for serving food and drinks. You could store bathroom items on them. They could display photos and other pretty stuff. The options are endless!
Most bar carts you come across now have pretty much seen their best days. They are usually rusted, broken wheels....they just look sad. We found this bar cart along the curb that someone was tossing out and I knew we could bring it back to life.

What you'll need:
marbled contact paper
an old bar cart
spray paint - I used this one and love it!
sandpaper (optional)
Start by giving your bar cart a good cleaning if it needs it. My cart had some real rusty areas as well as some areas that had chipping paint. I took some sandpaper and lightly rubbed down all of the metal areas to remove the rust and the paint chips. Then using a damp rag or towel, wipe the entire bar cart clean to remove all the gritty mess.
Then tape using some painters tape, tape off the wheels on your cart so that when you paint it won't hit your wheels. Make sure to cover the entire wheel completely. Then it's time to spray paint your cart. I didn't bother to spray the surface of my trays because I knew they were going to get covered. Give your cart a good 2 coats of spray paint and let it dry completely.


Then it's time to add your marbled contact paper

Once you have your contact paper cut to size you can attach it. Carefully remove the backing and try to avoid getting too many kinks in the paper. Just go slow and take your time. Then starting at one end of the tray, begin to stick down your contact paper in place. You will likely have to pull it back up and restick it down a few times, but it should still stick just fine. When you have it stuck down, if you need to, grab a credit card or something similiar and go over top the entire tray to make sure it is stuck down good especially along the eges.

Then you are ready to add your drinks and have your friends or family over for some fun!
do it yourself
Want more DIY's?CrazyDIYmom.com Contact Us Privacy Policy Disclaimer About me