
DIY home projects
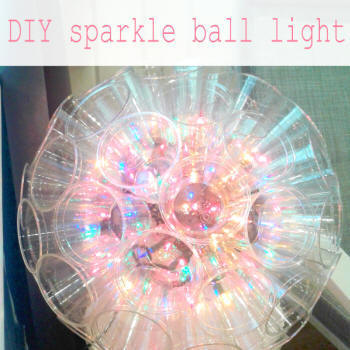
DIY sparkle ball lights
* This post may contain affiliate links.
These are AWESOME!!!
I am obsessed. You can make them any color or multicolor. You can hang them in your patio, you can hang them from your trees as christmas ornaments - believe me you will find reasons to make them and hang them up.
And they aren't nearly as complicated to make as it may seem. Once you've done your first one you will be able to make your next ones in less than half the time. And then you can experiment with other colors too. And soon all your neighbors, friends and family will see them and start asking for them too! Hey, what a perfect way to make some extra cash!
What you need:
50 clear 9oz solo cups. Trust me - get these solo cups
50 light strand of LED bulbs
stapler
exacto knife
some clothespins (optional)
Ok, let me explain why the I think these solo cups are best. I used Solo cups the first time and everything worked perfectly and easily. When I wanted to make another light, I went back to the store to grab more cups and they were out. So I got the same type of cup but in a store brand. What a hassle. They aren't shaped the same. They don't match up the same. They don't connect as easy. The plastic wasn't the same. Staples kept falling out. It was a hassle! I made one, but it took me 3 times as long and a lot of "rigging" it up to make it work and it still isn't good. So find the Solo cups!
Cut an X shape into the bottom of your cup with an exacto knife. Do it to all 50 cups. Some people have also used a drill and drill bit, but I couldn't find a small enough drill bit.
Now we are going to make your first "circle". For this row you will need 12 cups. All you will be doing is stapling your cups one to the next on the side of the cup until you make a circle with all 12 cups.

Once you have that row completely stapled together we are going to do the next "row" which will staple on to the top of the circle you just did. They will also be stapled on their sides to the cup next to them. This row will need 9 cups. This is where the clothespins come in. Use the clothespins to hold your cups in place if you need to.
When you have that row complete you will need 4 cups to fill in the top hole that is left. Again, staple them to the cups below them and the cups along side them.
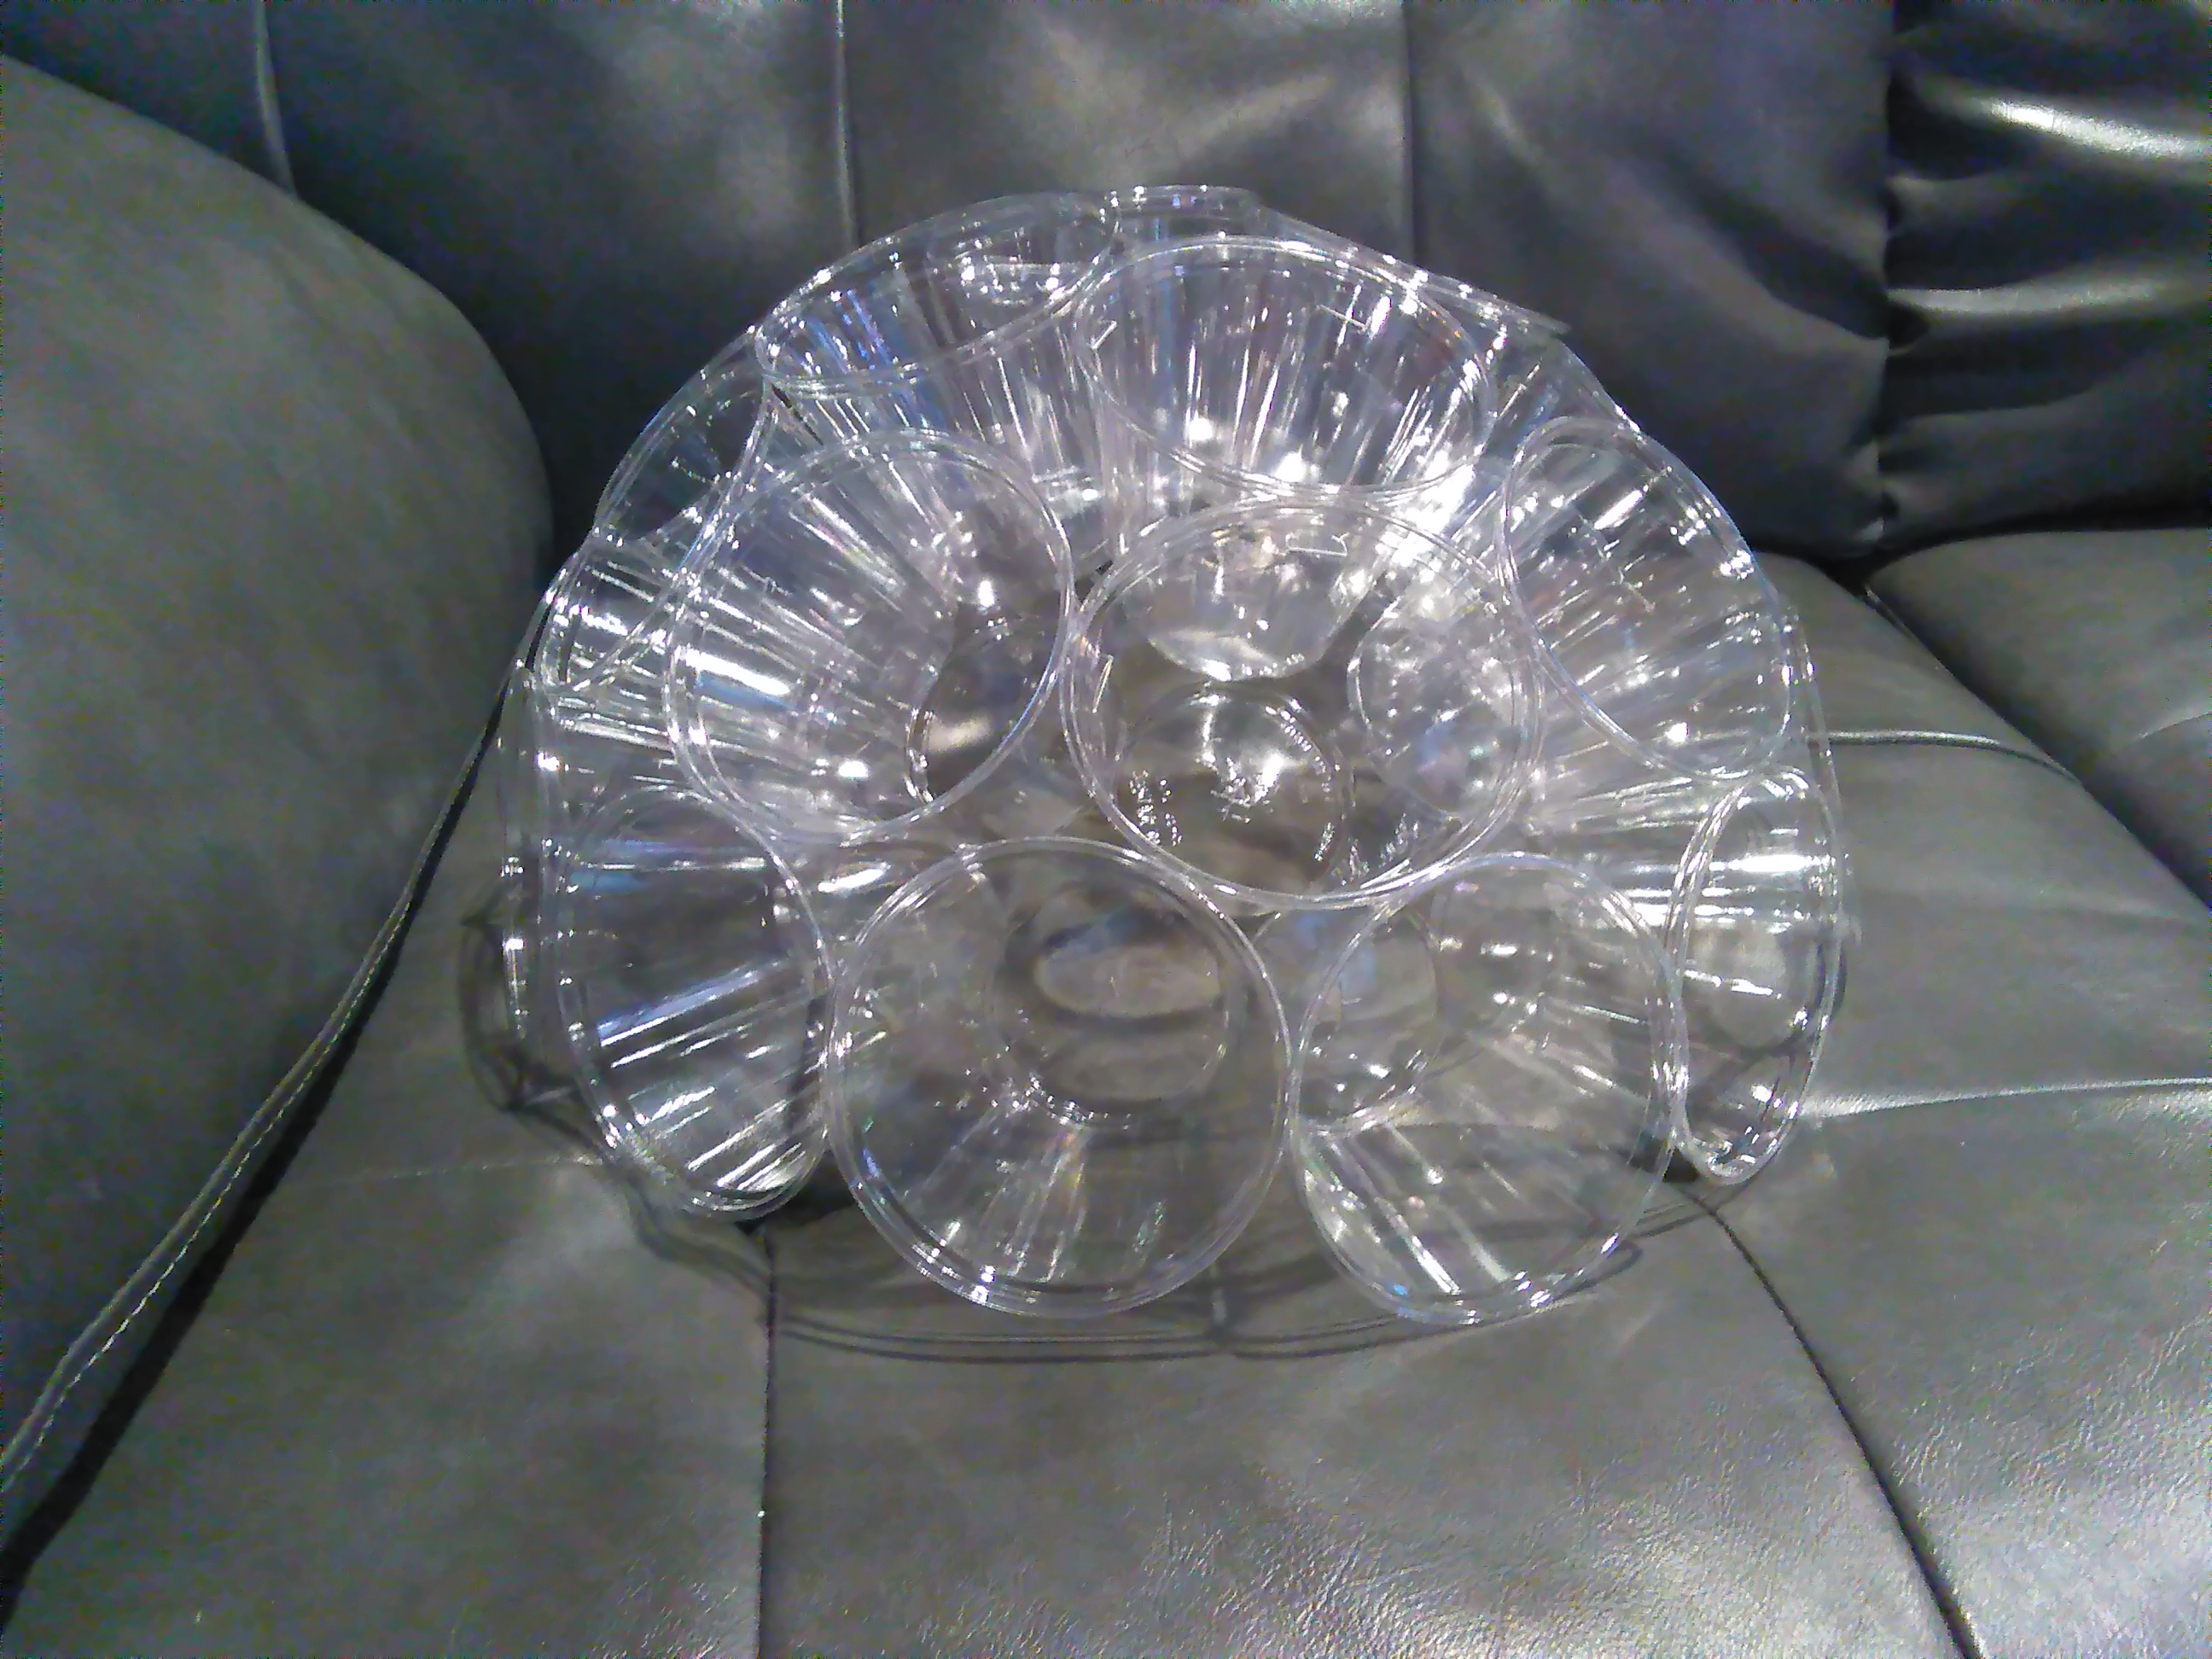
That is 1/2 of your sparkle ball.
Now you have to do those steps over again to make the other half.
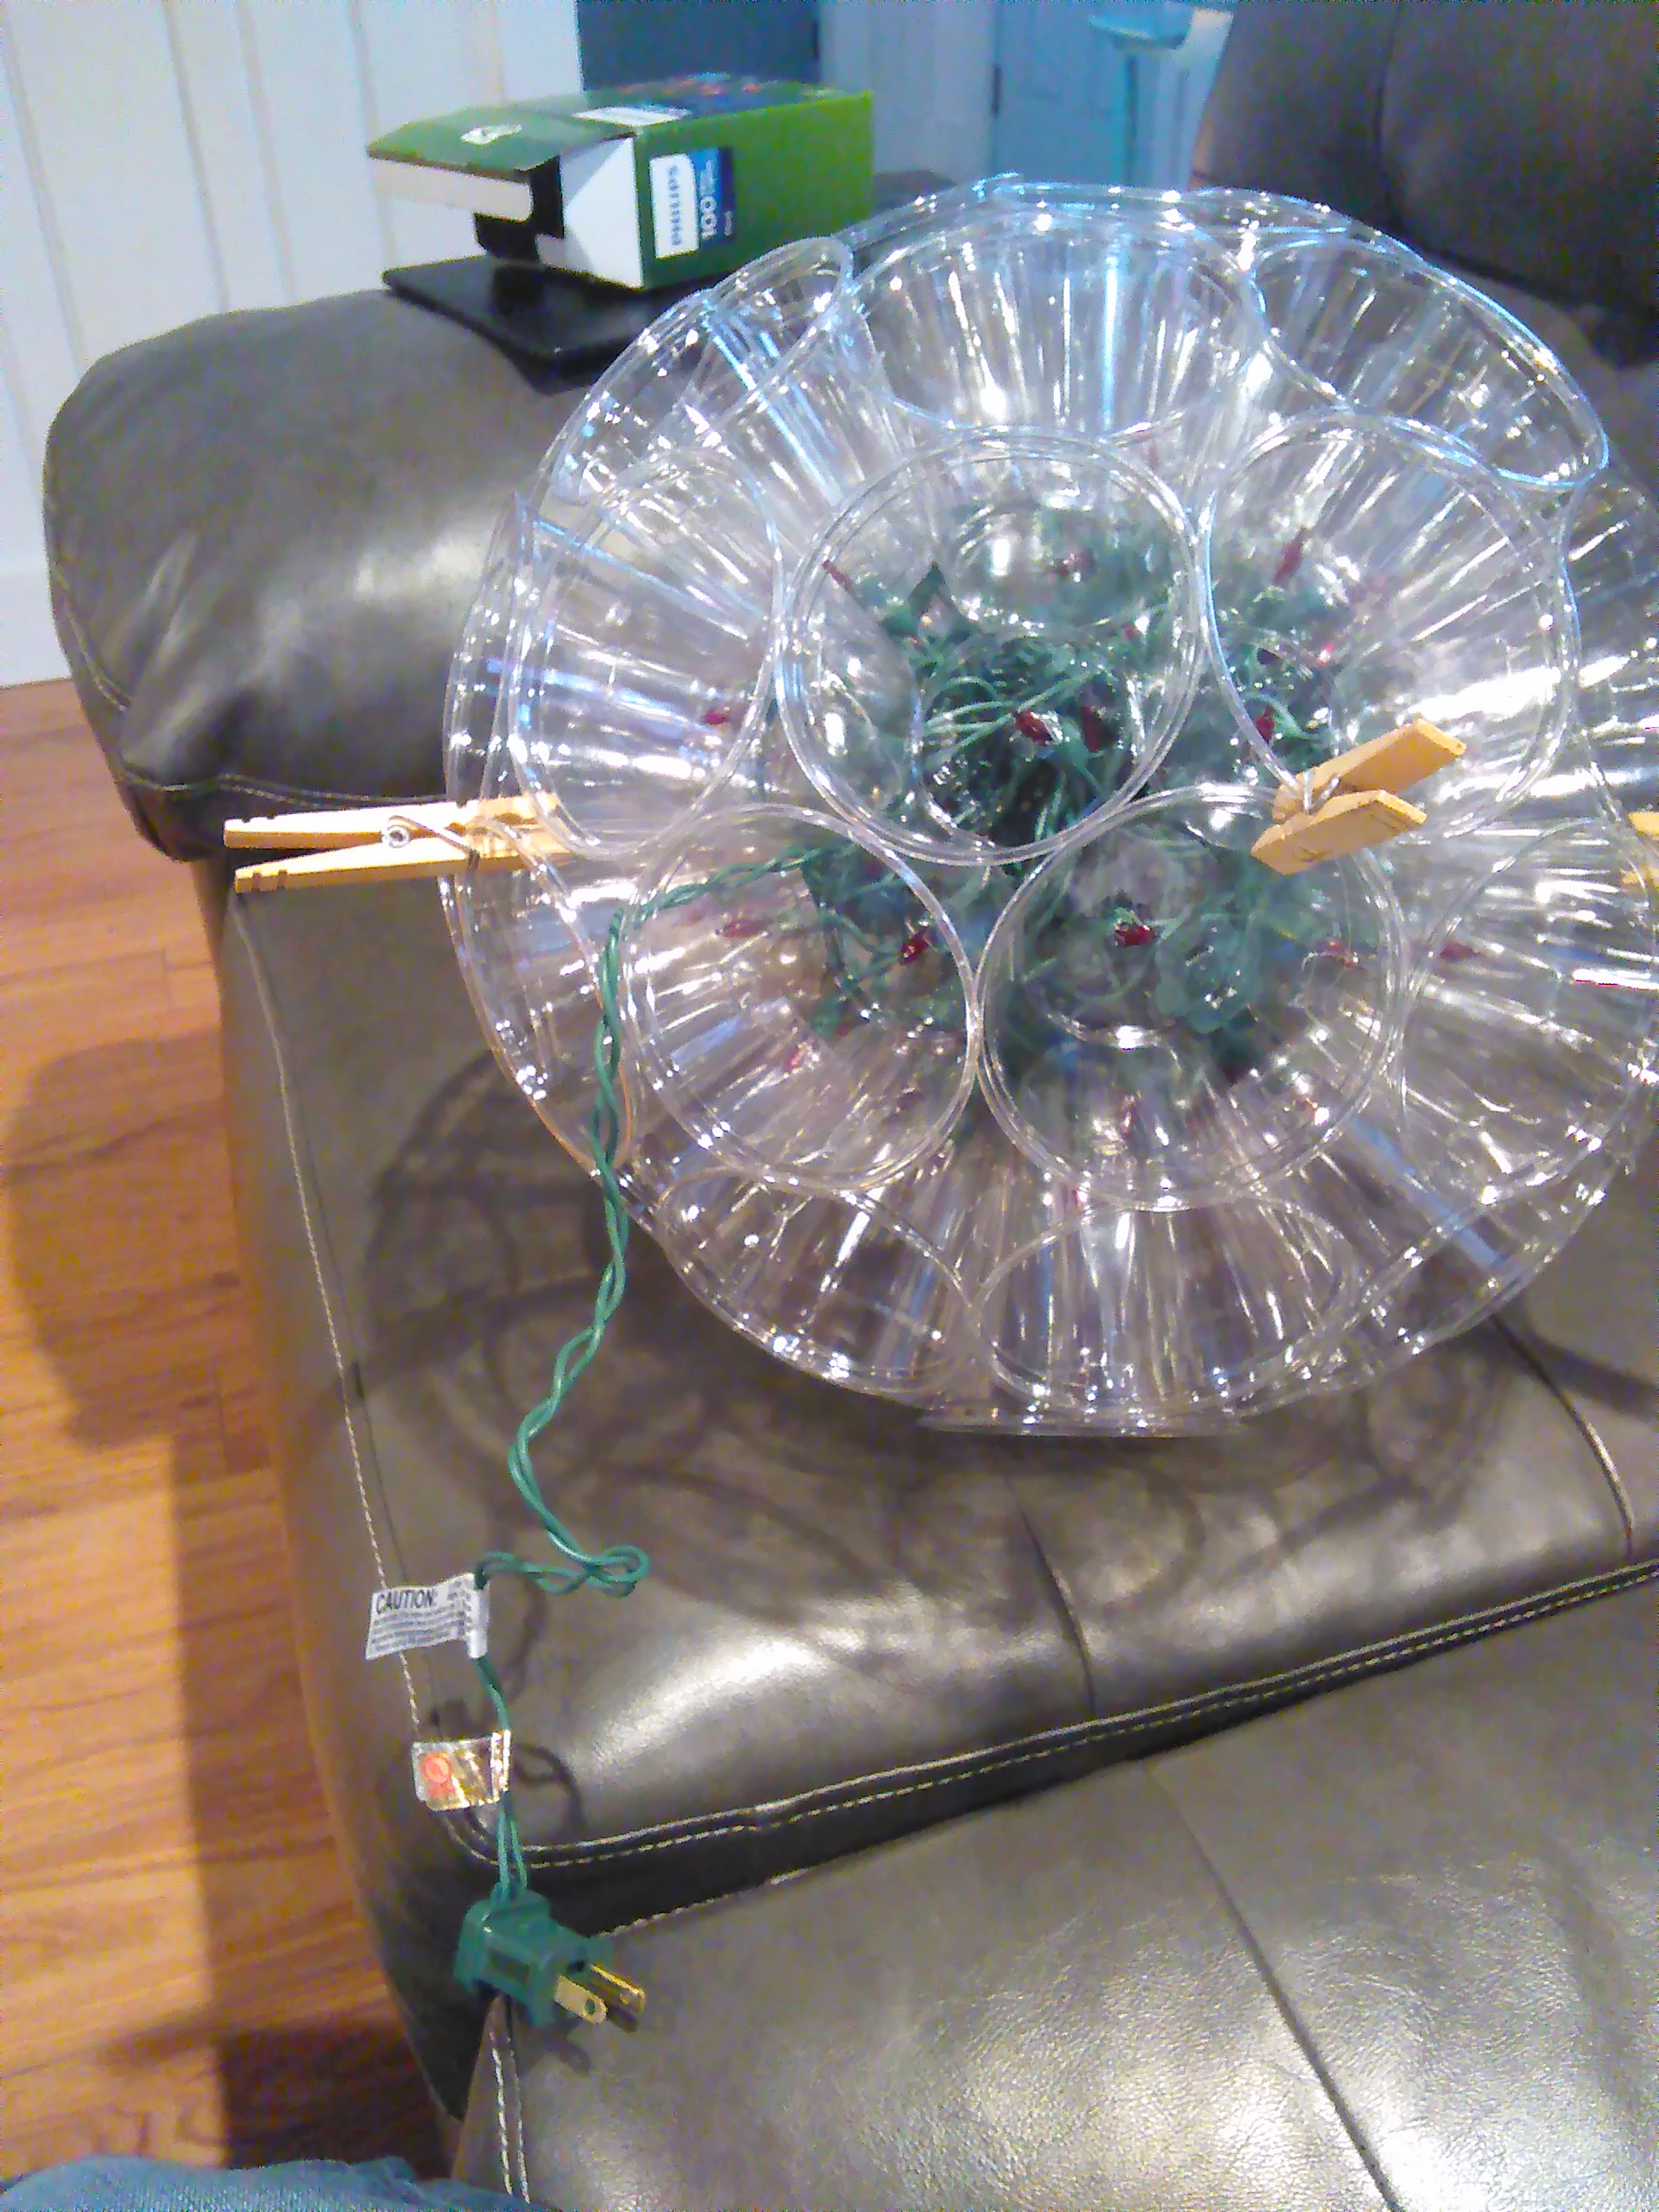
Once you have both halves done you are ready to add your lights!
Start by finding the end of the plug that you will plug into the wall. You want to make sure you start inserting your lights from that end. Take the very first light bulb by that plug and insert it into the center hole. Work your way around the light set and the cups. If you need to you could add some glue to your cups, but mine stuck in perfecty.
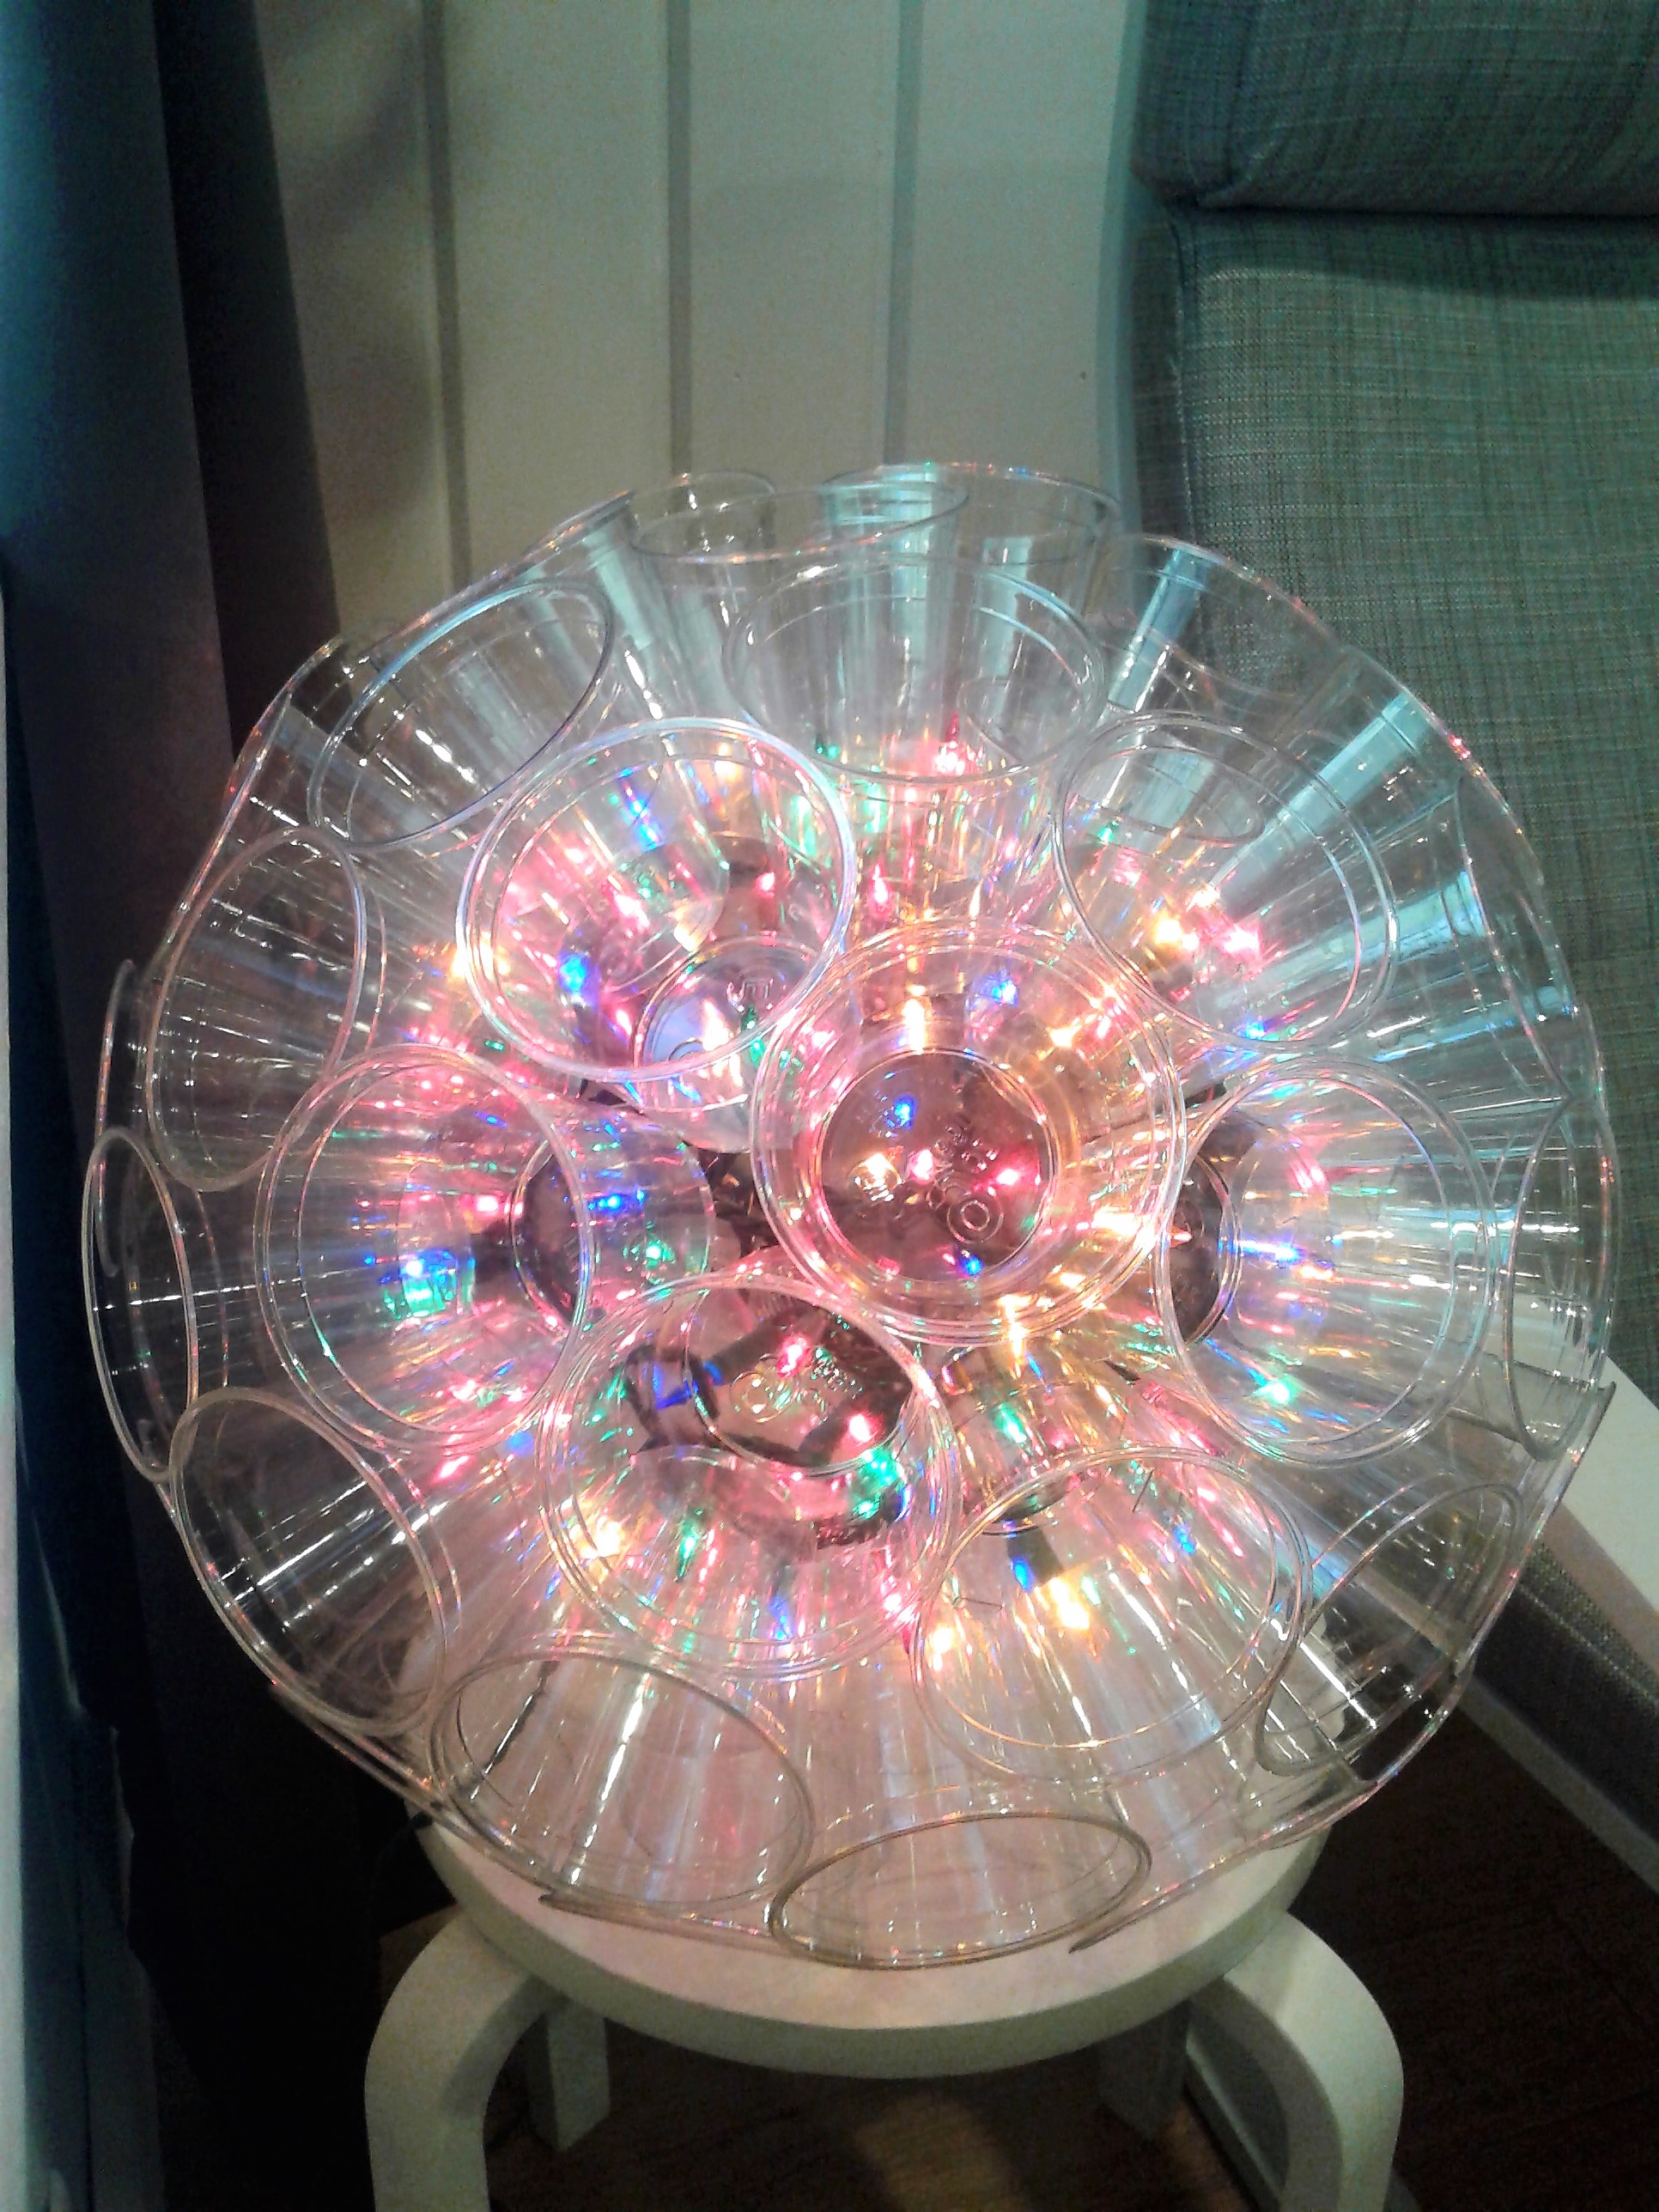
Once you get one half done do the same thing to the other half. I used a set of lights that had 100 lights so with the extra lights I just stuffed them in the middle of the ball. Then you are going to close up your sparkle ball and staple the two halves together.
Now plug it in and admire it! Don't you want to make more?!
And like with any lamp/light - DO NOT use unsupervised.Want more awesome DIY's?
CrazyDIYmom.com Contact Us Privacy Policy Disclaimer About me