
DIY home projects
Beach inspired sand pumpkin

* This post may contain affiliate links
Living near the beach I have a lot of decor that is inspired by the water, so when it's time to decorate for the holidays I try to incoporate the holidays into the beach decor. For Christmas I decorate with mostly white and teal and for fall I love to decorate with more of a blue, maroon/pink and burlap theme. This way I don't have to change all my beachy decor (teals, grays & coral colors) when the holidays roll around.
Fall is always the trickiest. I don't like the traditional fall colors of brown, red and especially orange. Unfortunately, pumpkins always seem to come in the color of orange ;)
Until today! I absolutely LOVE this DIY. It is so easy and so cheap and I can use them for fall and for halloween! BONUS!!
What you'll need:
carveable pumpkins
a knife or creative versa tool
mod podge
sand

This is my carveable pumpkin I found at our local dollar store. If you're thinking about making this craft in the future, grab a few from the dollar store, I've seen them sell out many times.
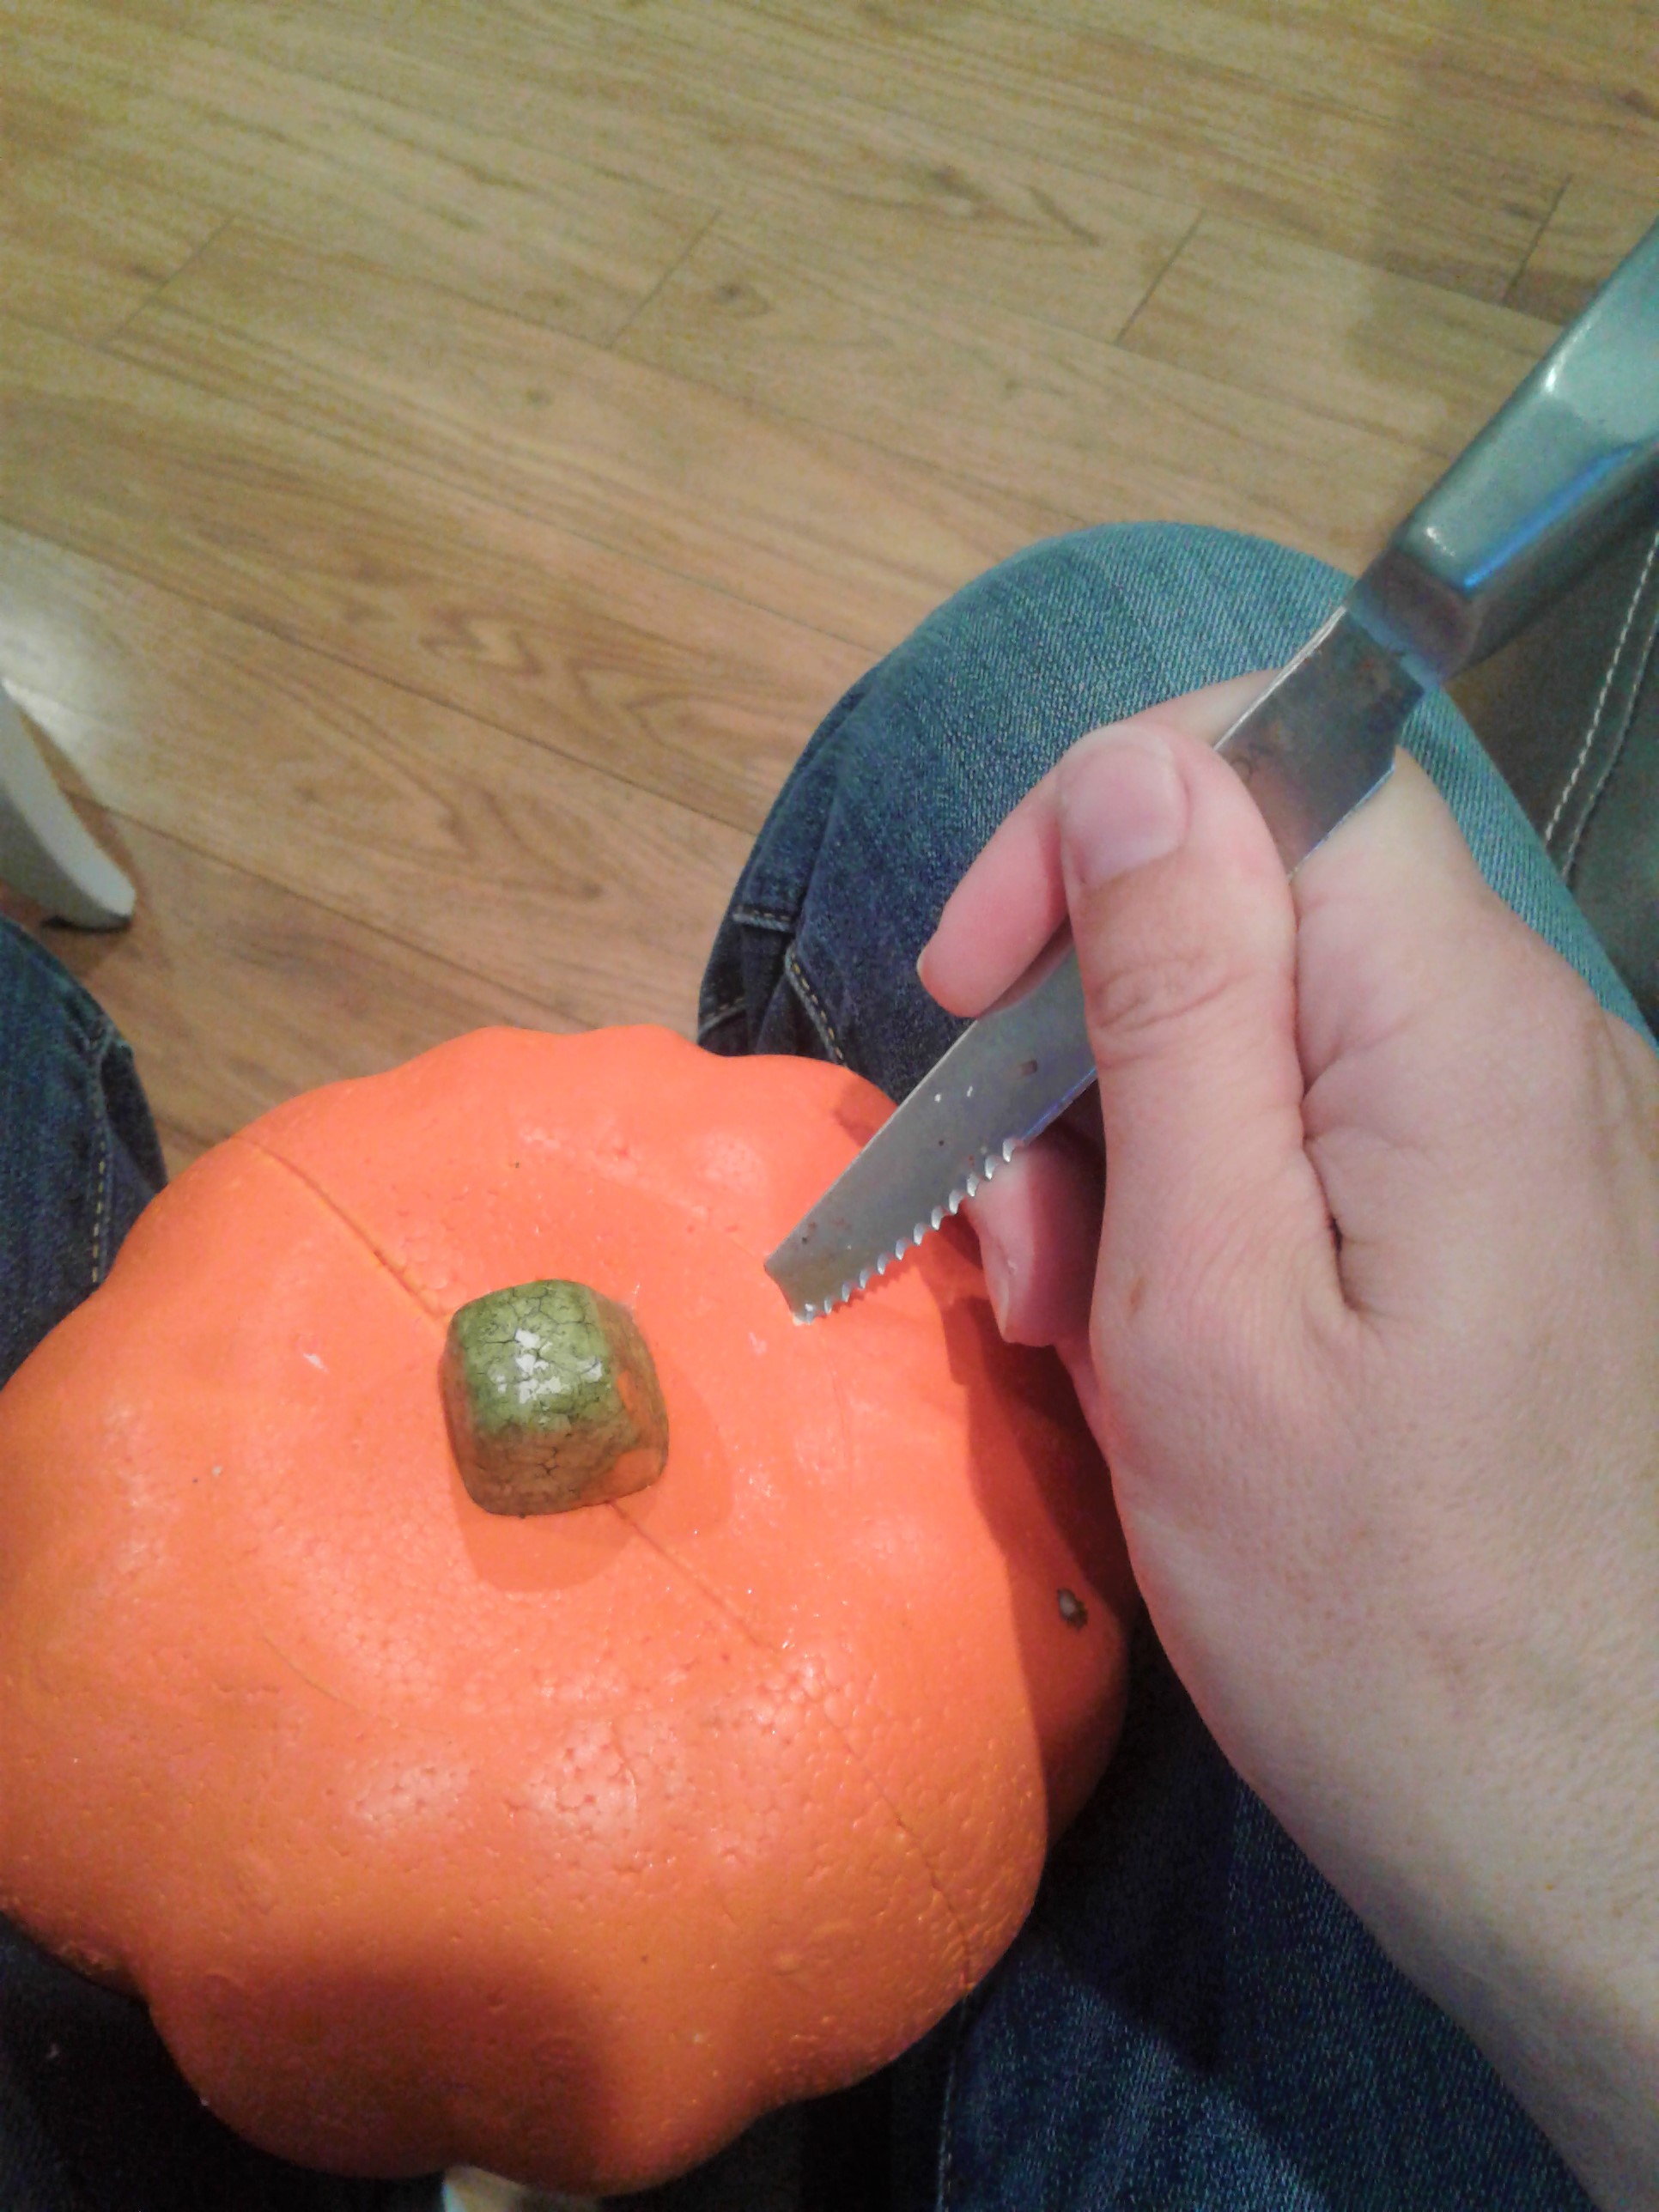
Start by cutting the top off of your pumpkin. I used an old steak knife turned crafting knife to cut mine and it worked great. You can also use a creative versa tool
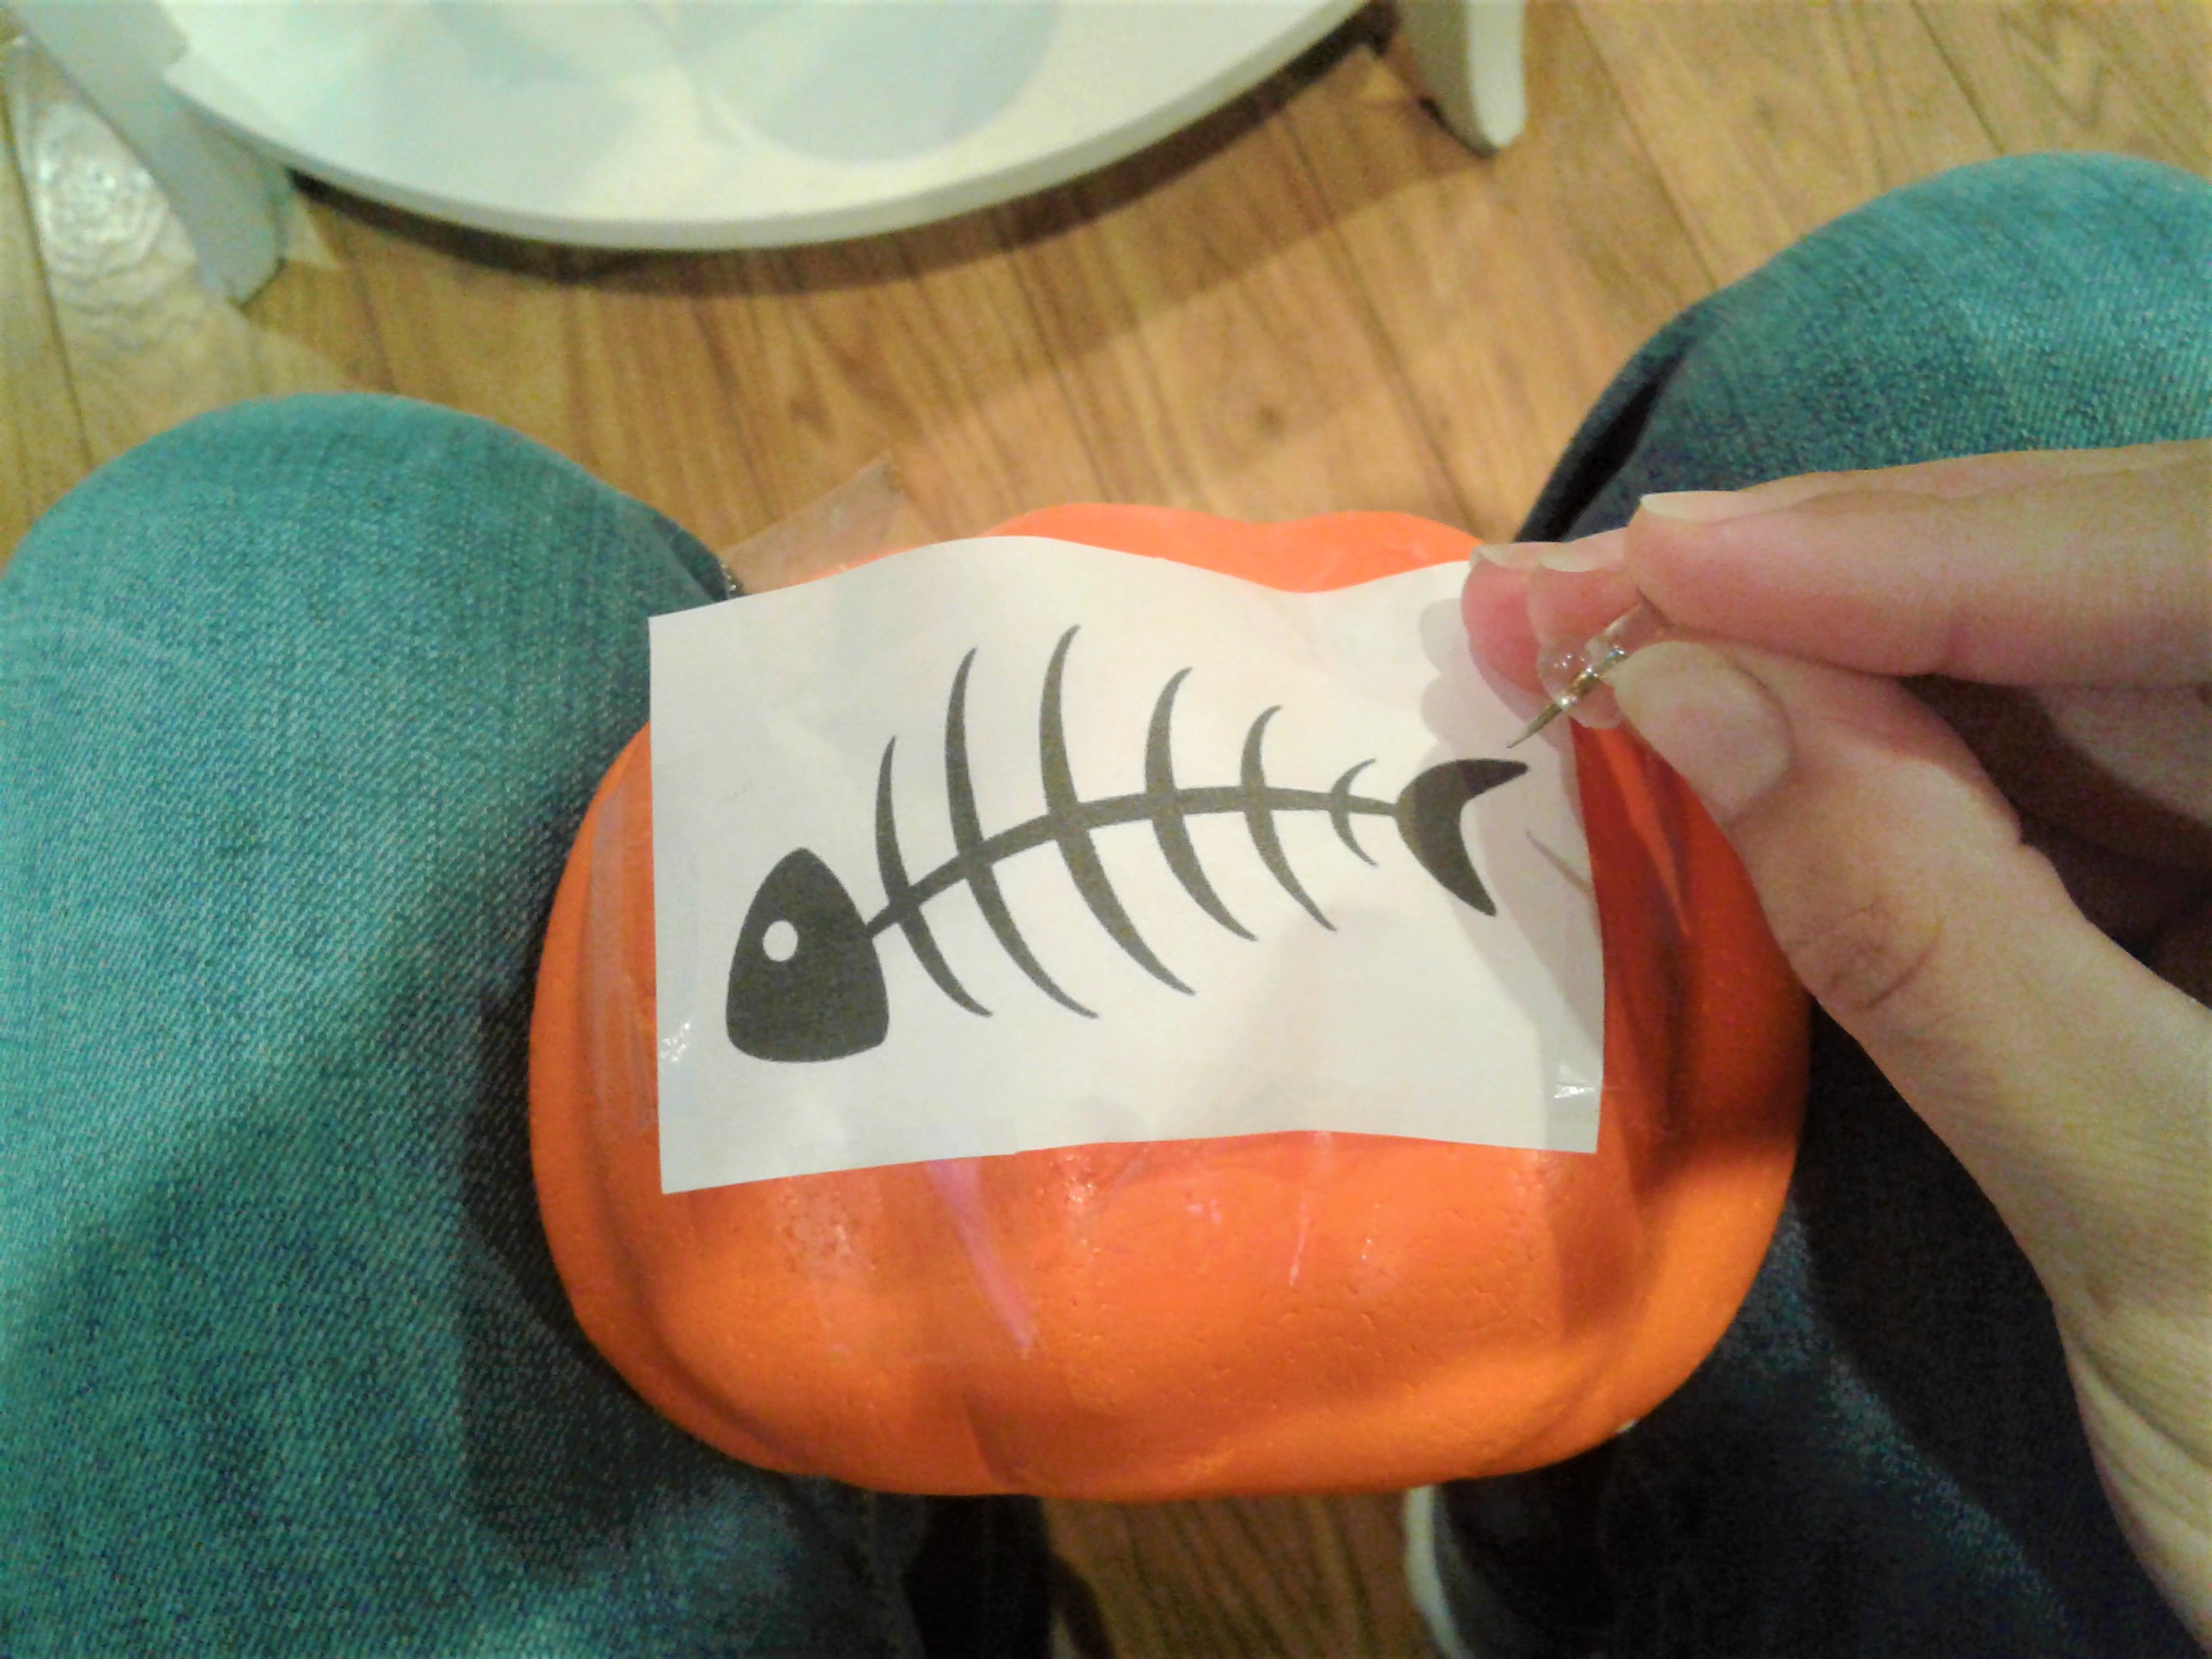
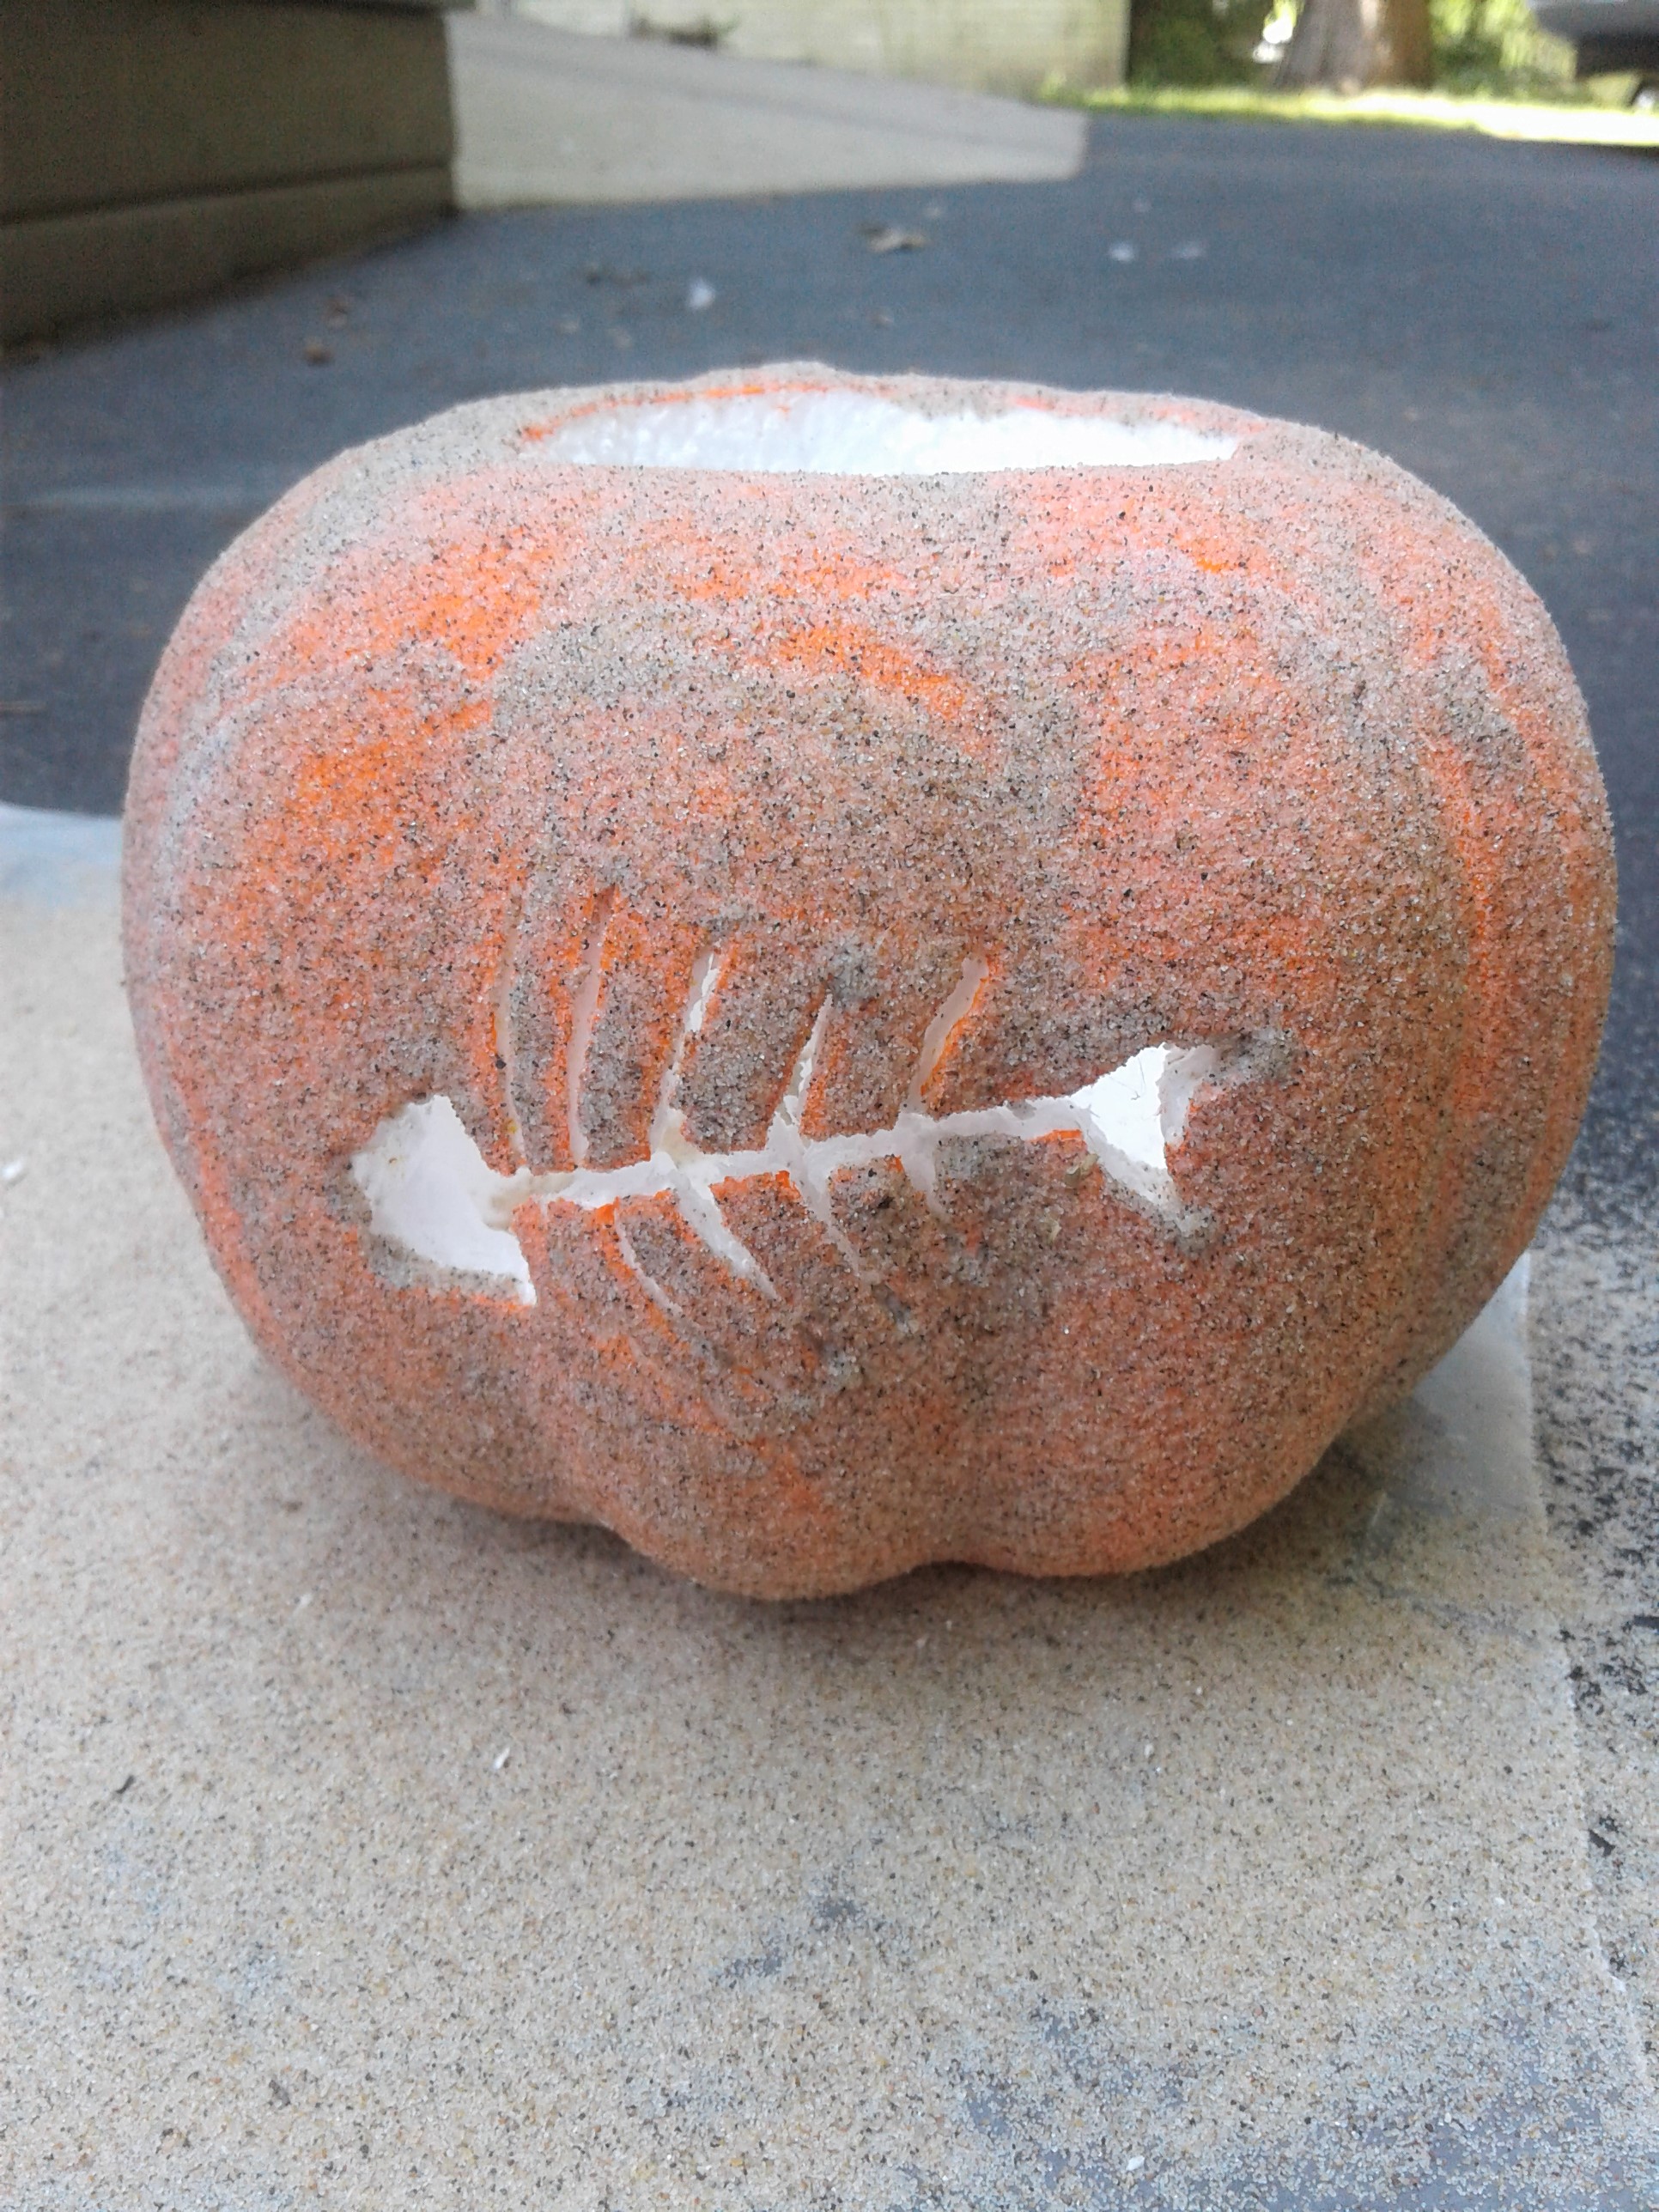
Then you'll need to print off an image that you want to carve into your pumpkin. I picked these adorable fish bones and printed them off in a wallet size to fit perfectly on my pumpkin. Tape your image onto your pumpkin and with a thumb tack (or needle, nail, etc) poke a hole into your pumpkin following the outline of your image where you want to carve. When you are all done, you should be able to see your image on your pumpkin.
Then, using your creative tool or steak knife turned craft knife carve out your image. I started with my creative versa tool
Then it's time to add your sand to your pumpkin. Apply a layer of mod podge
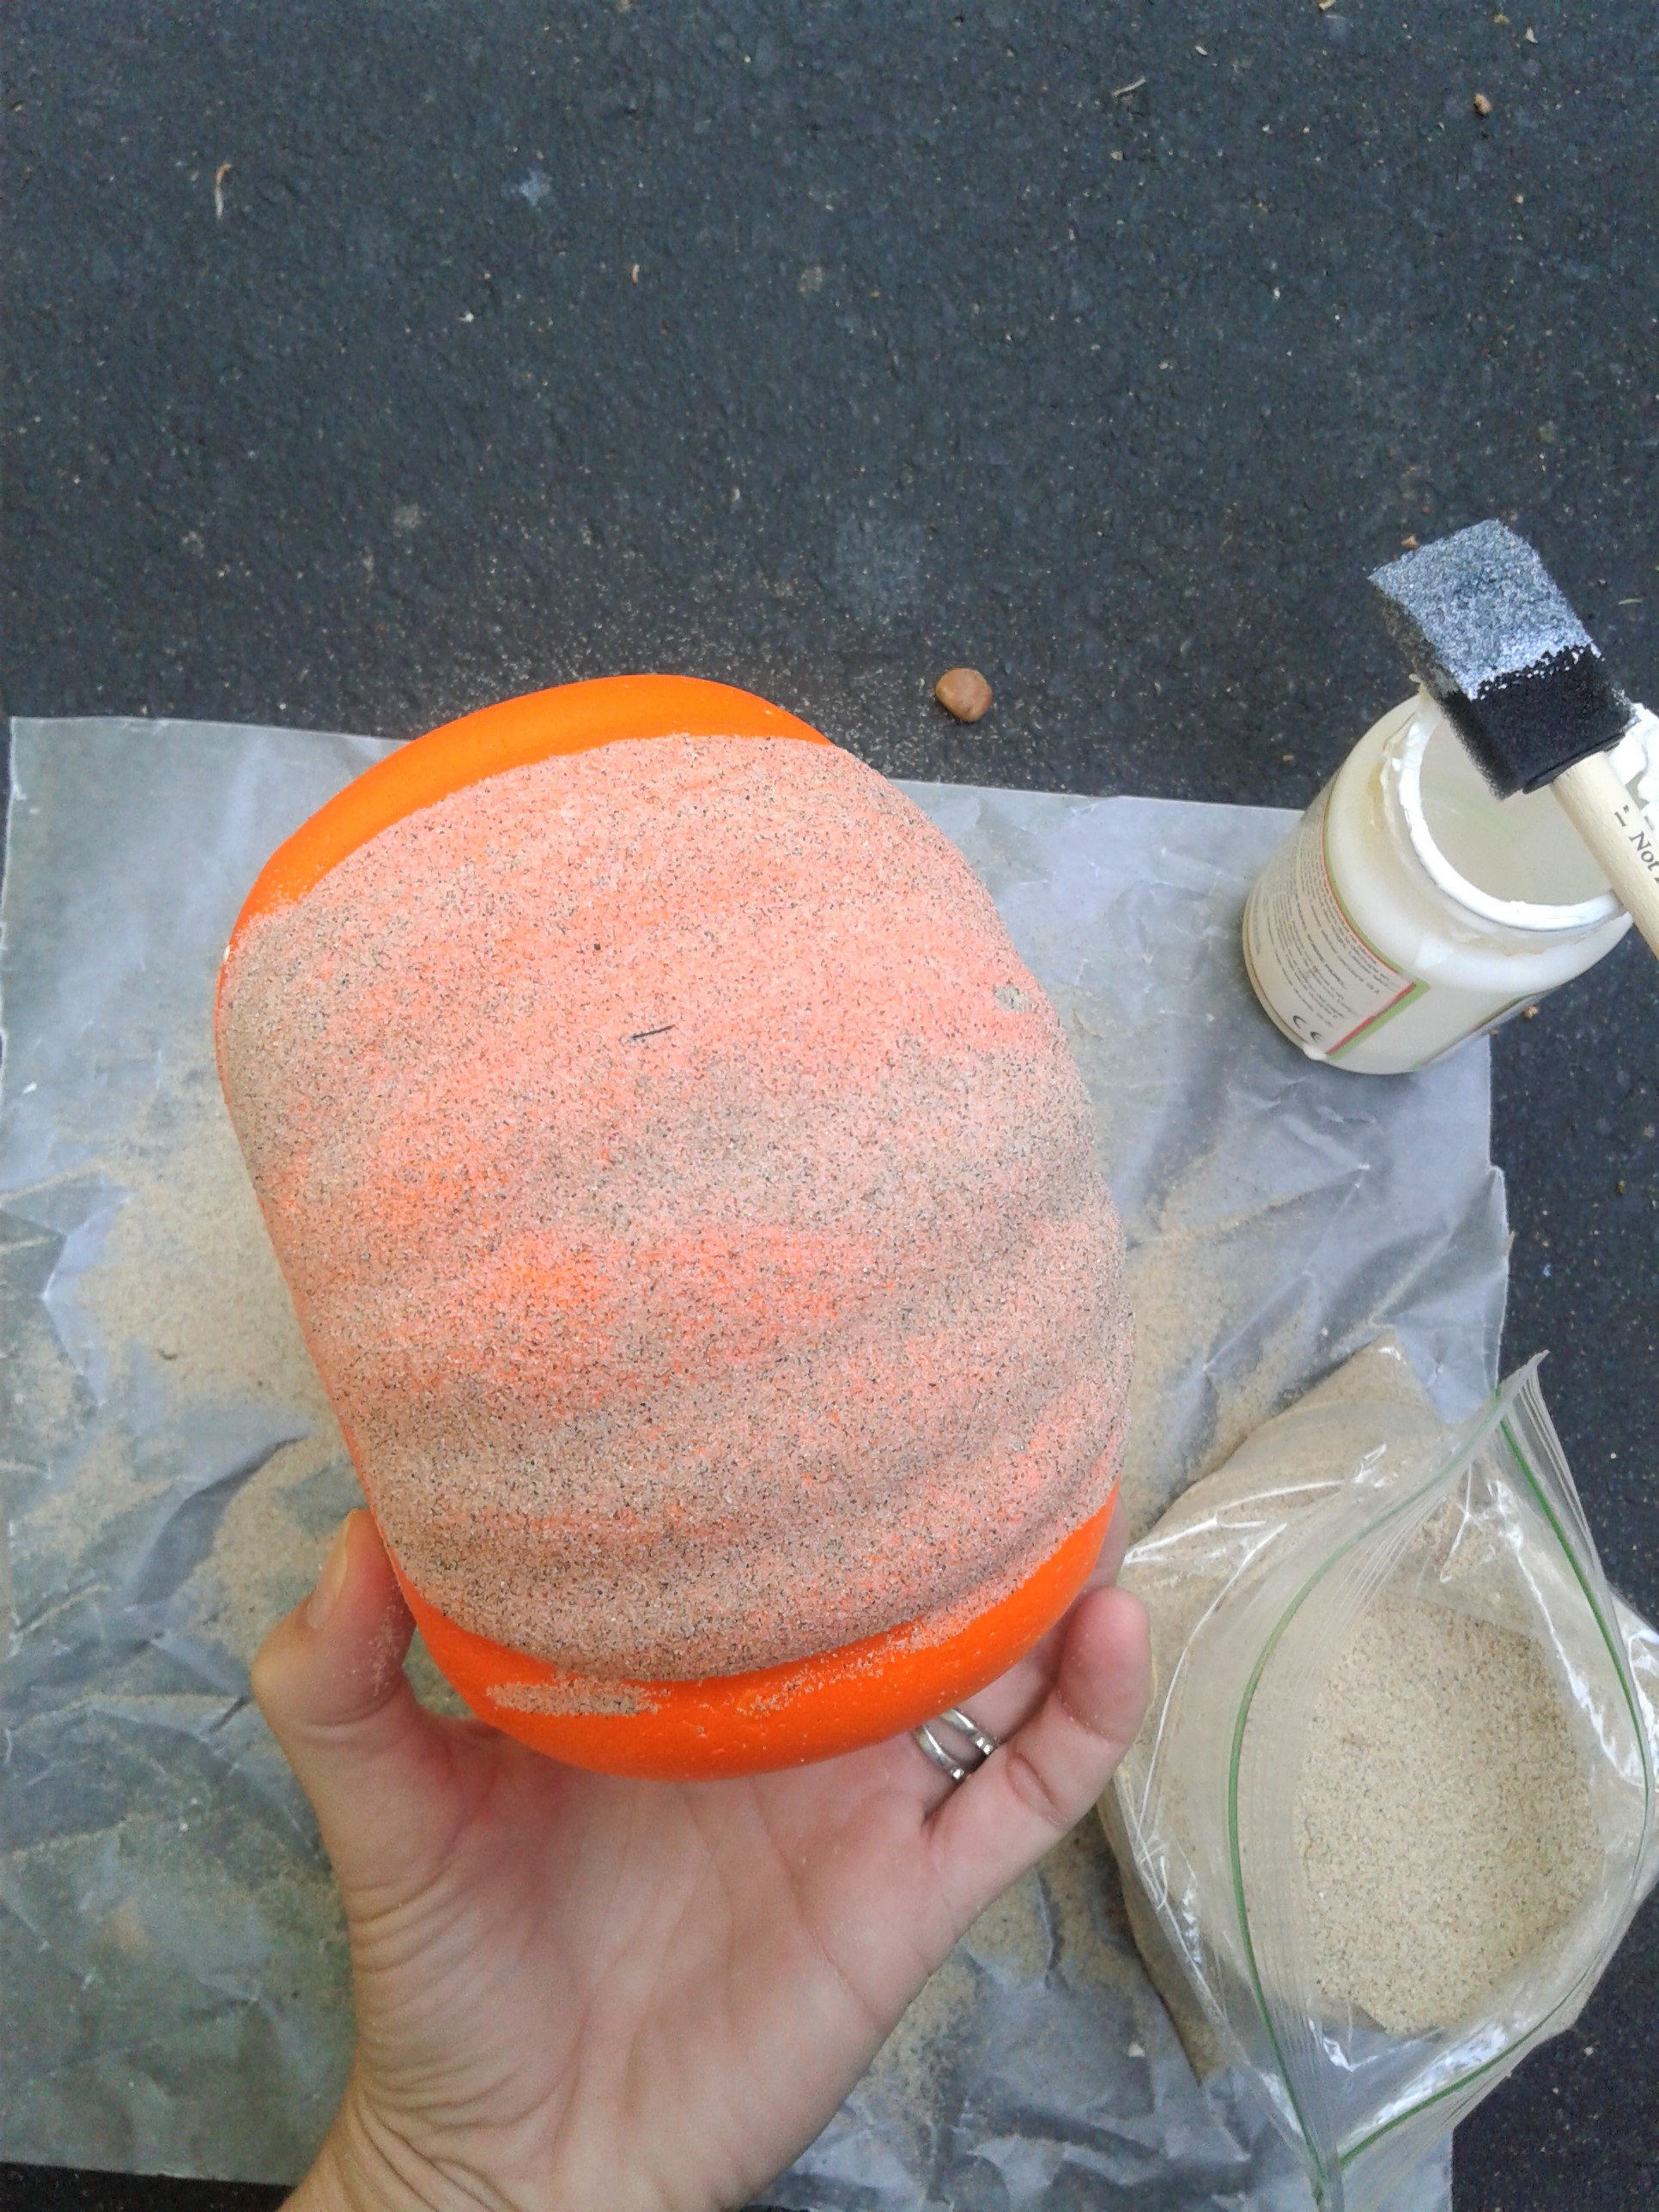
After that layer has mostly dried, add a good layer of just mod podge
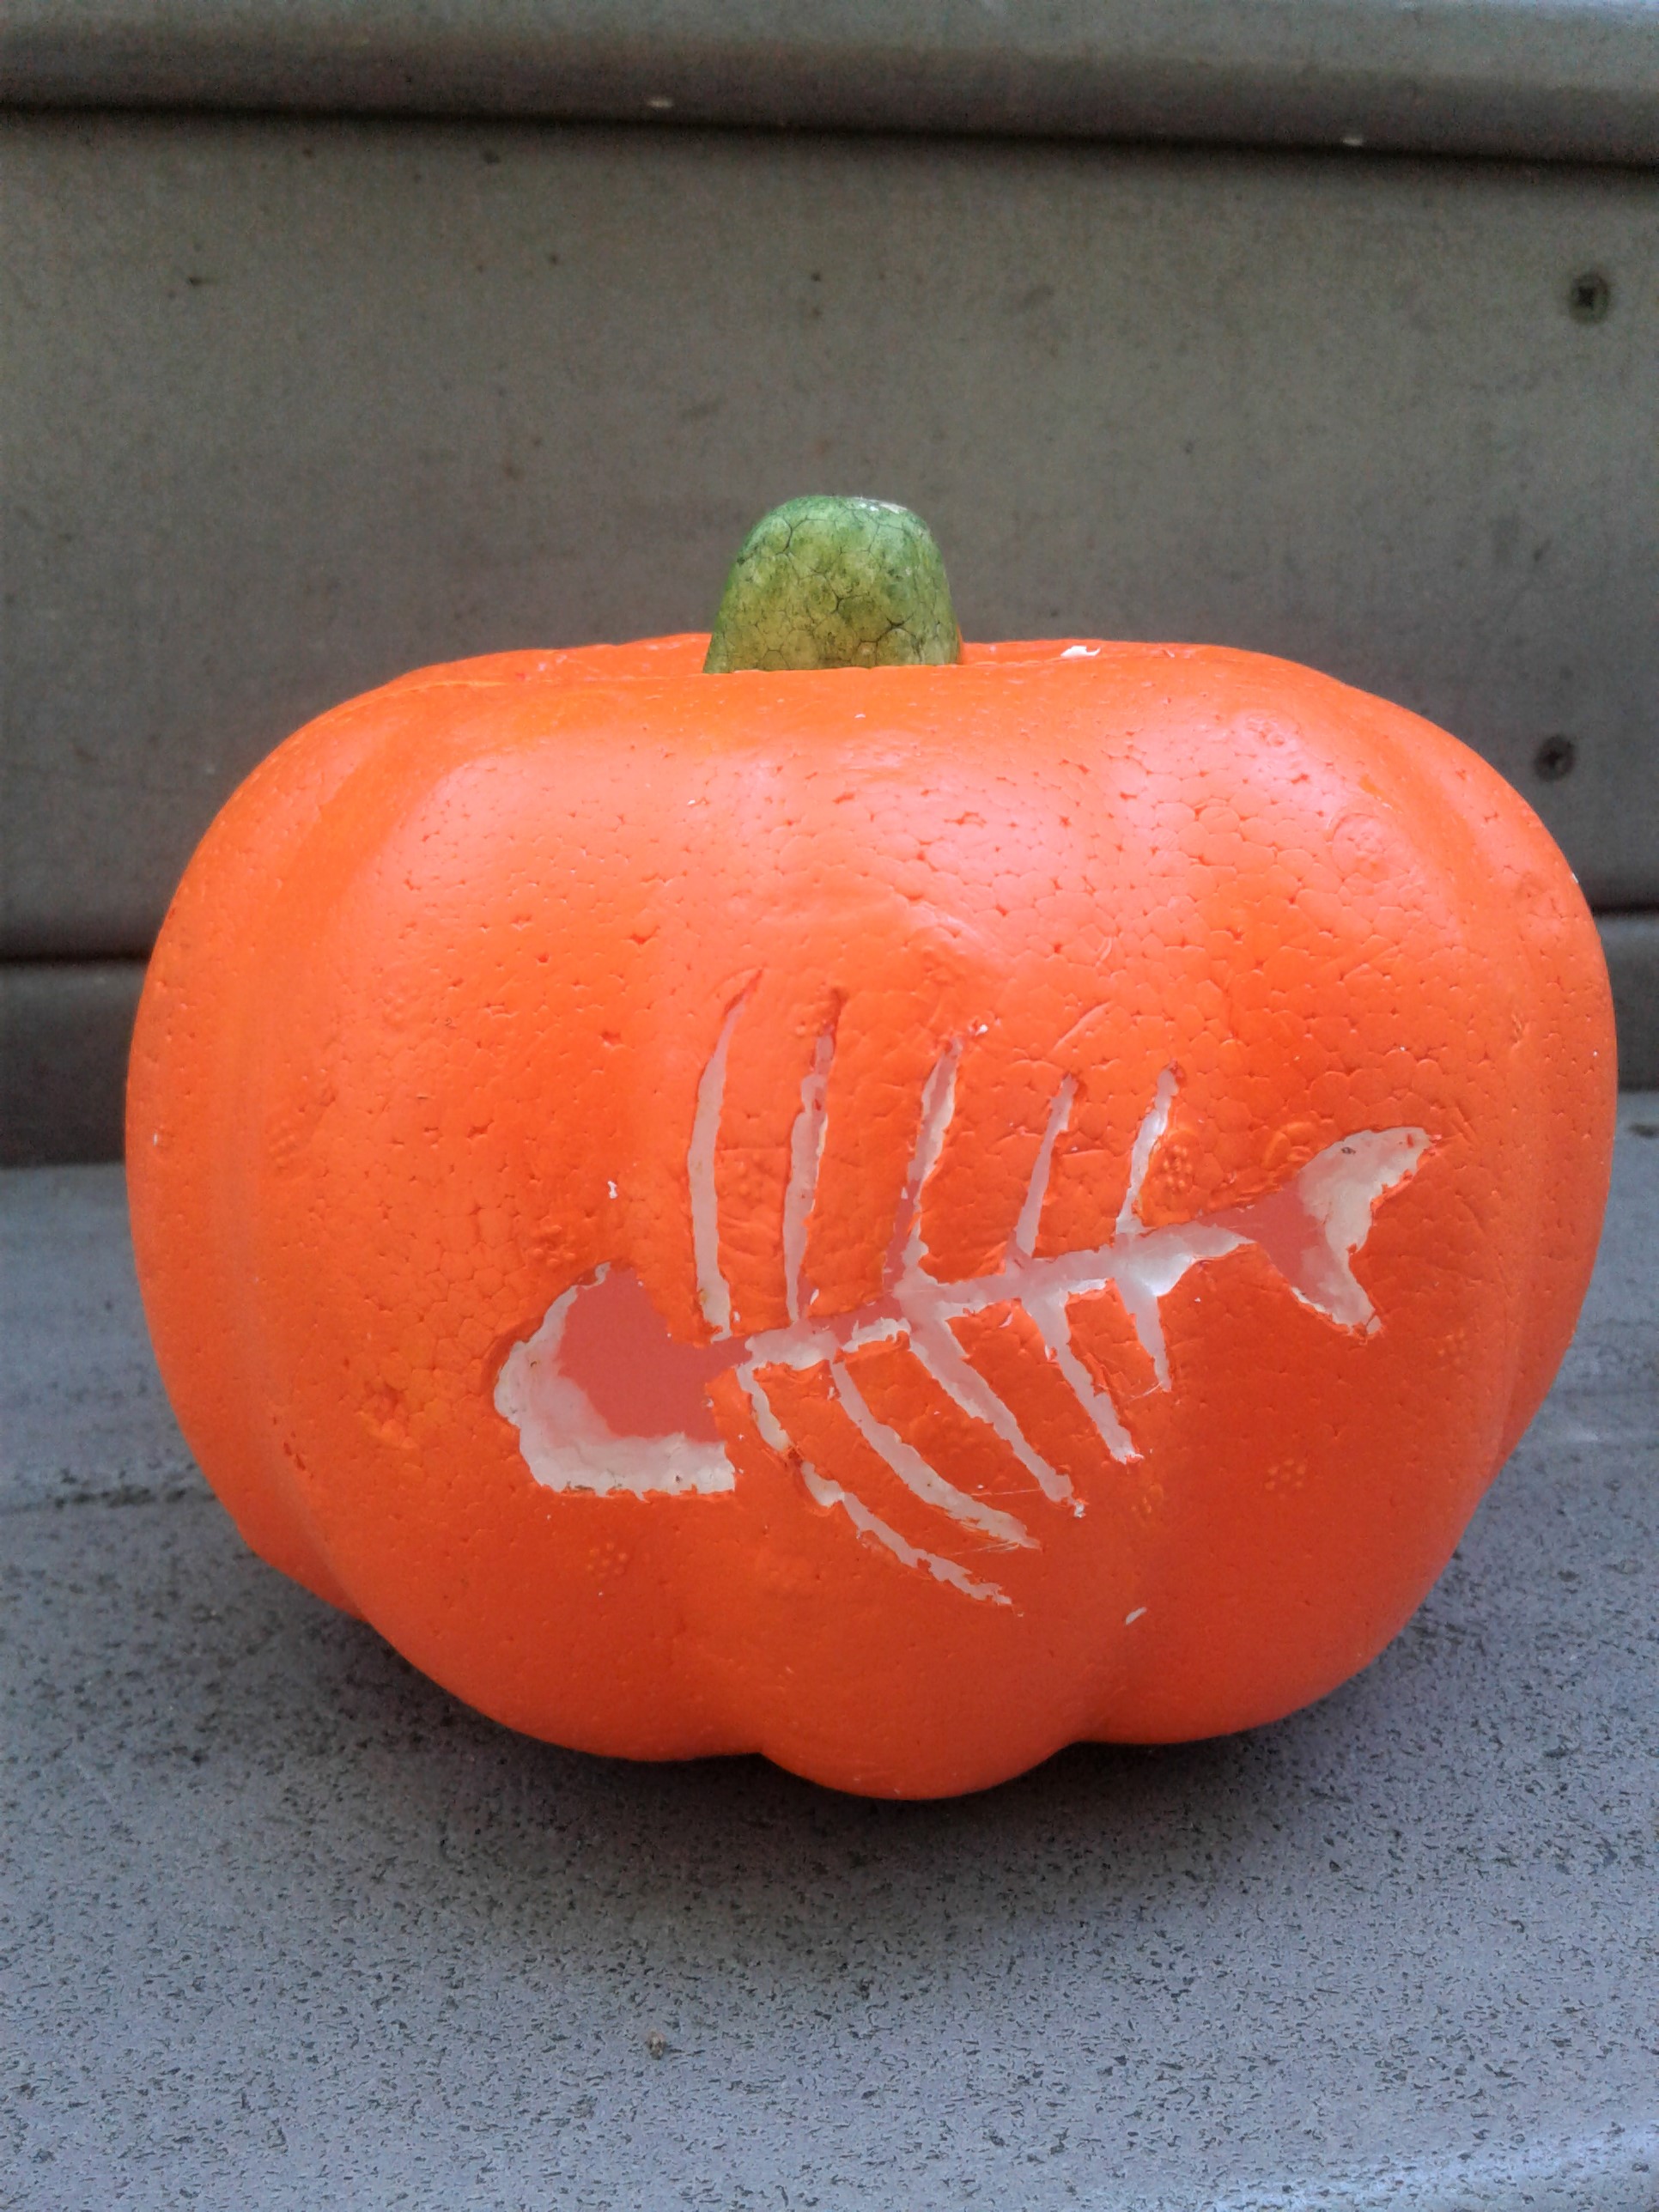
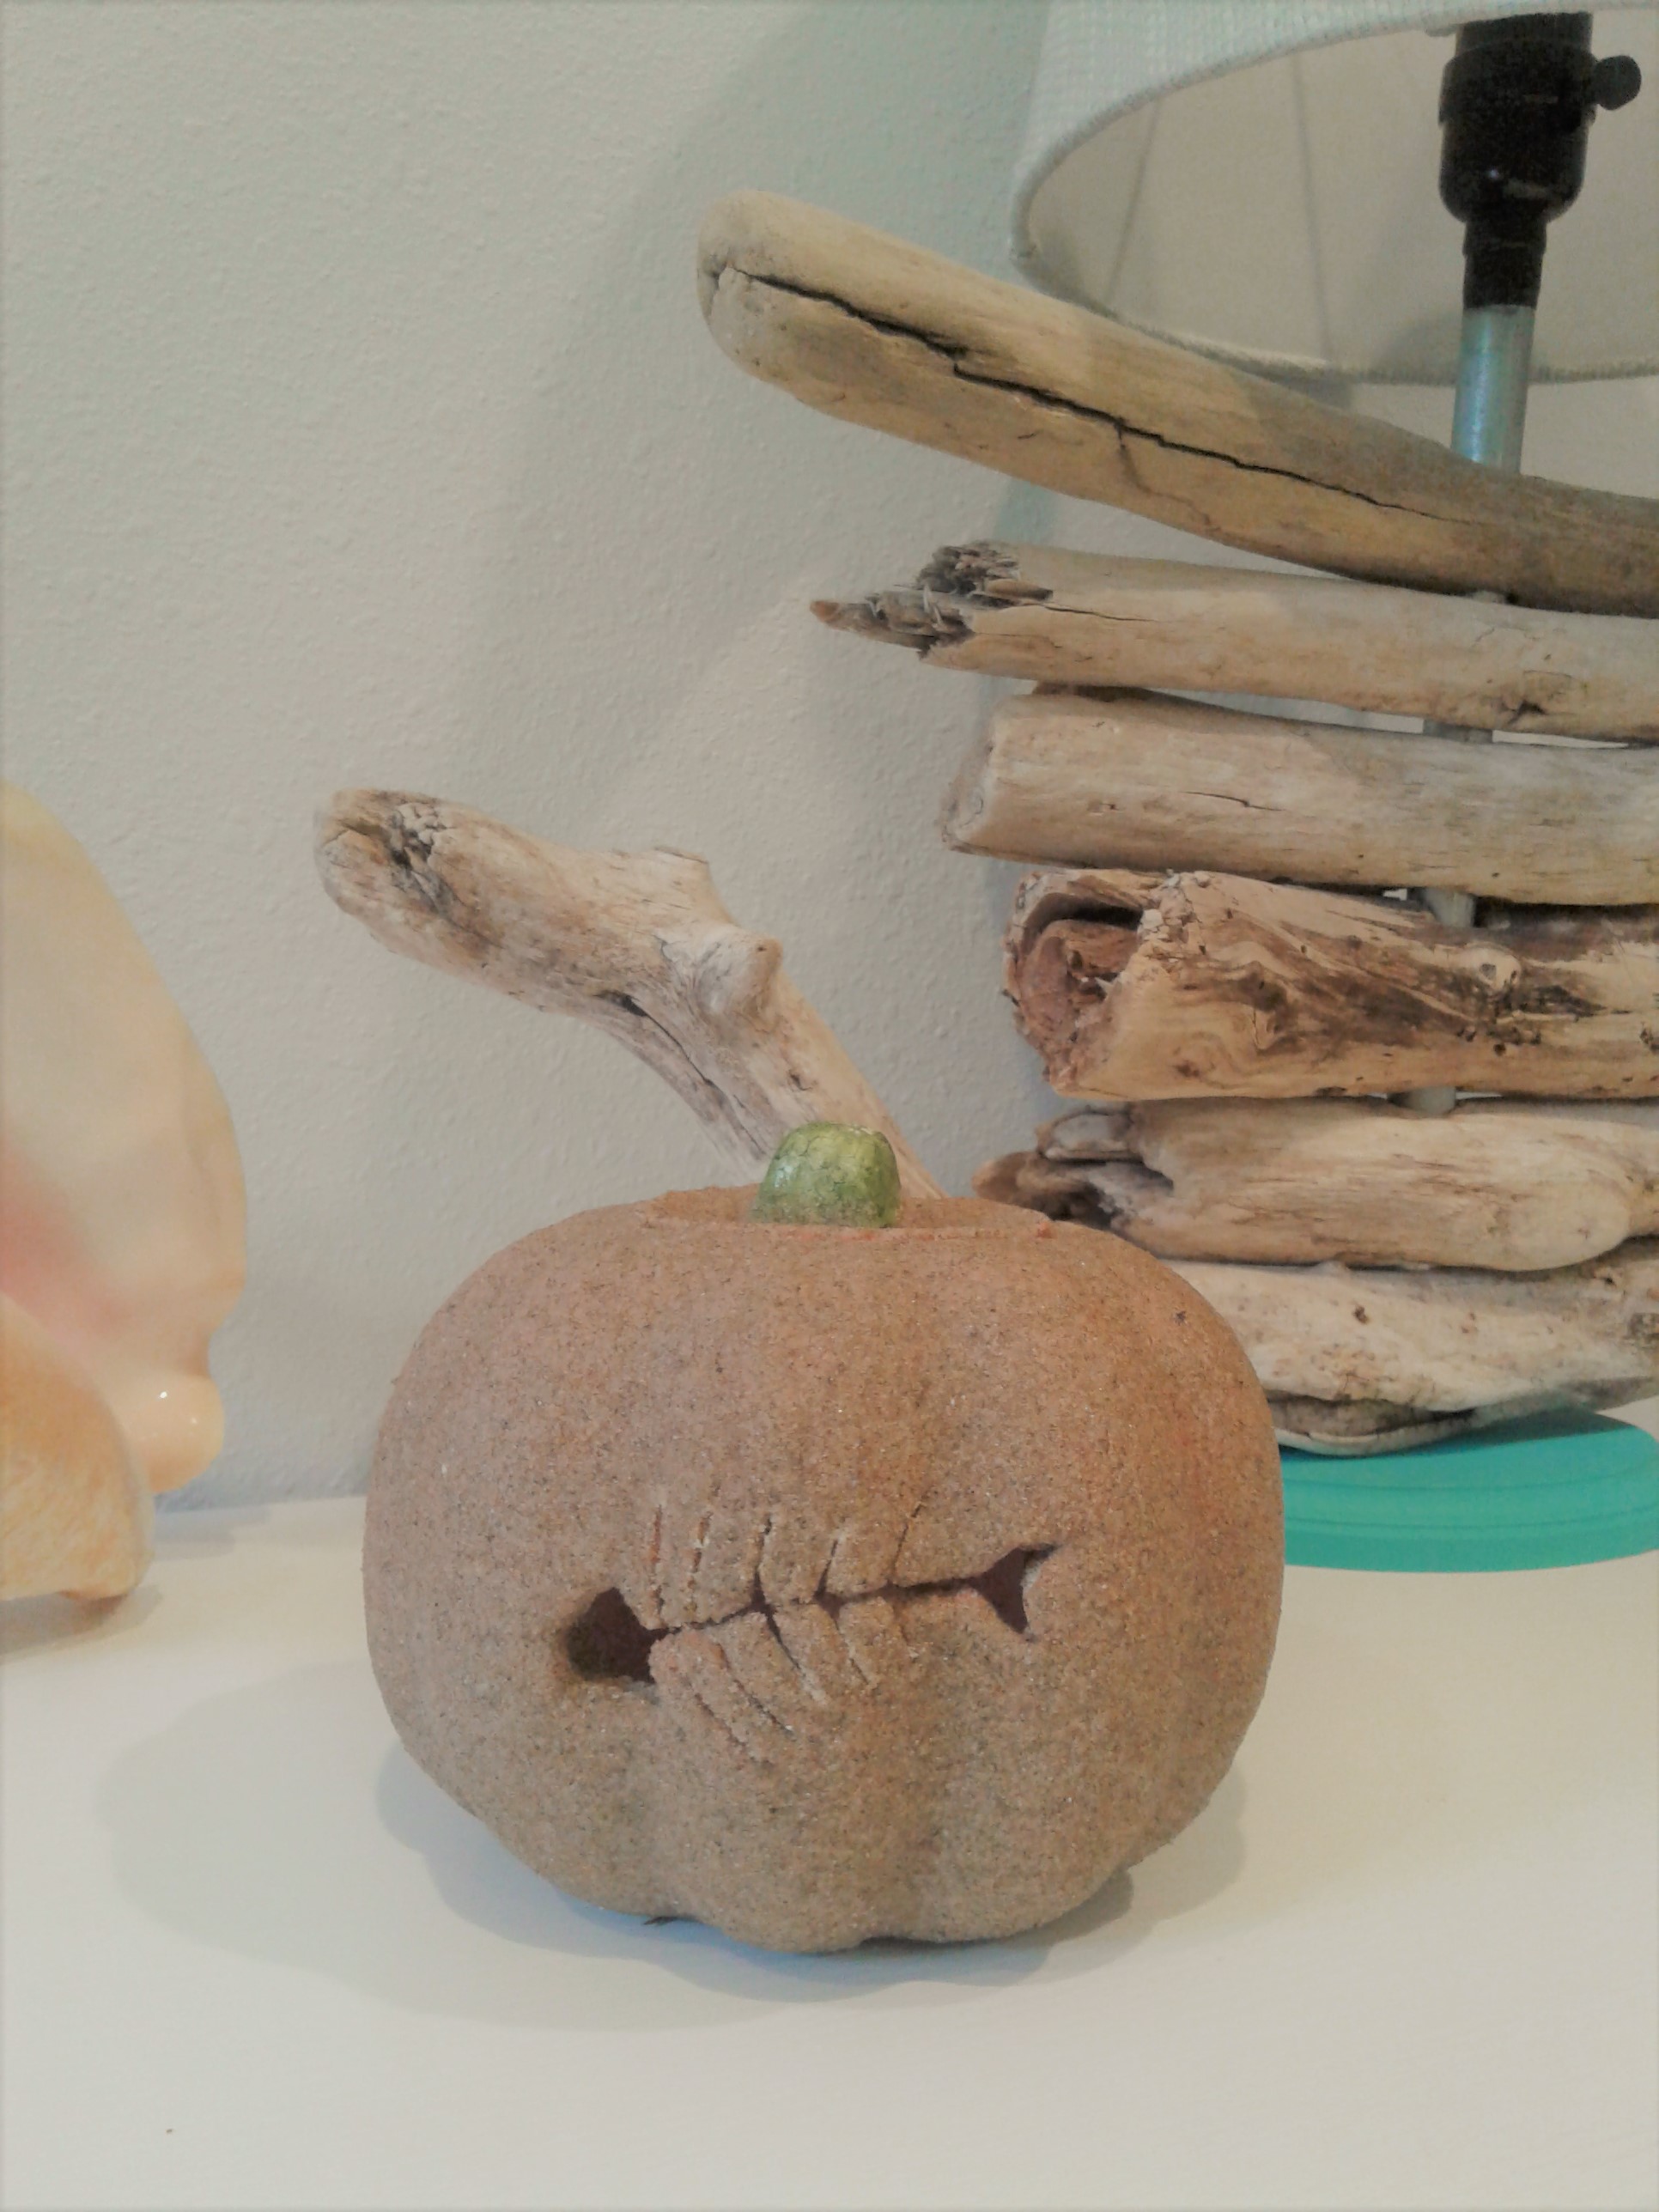
Once the mod podge has completely dried you are ready to display them! Add a battery operated tea light to the inside and your pumpkin wil glow at night. Best part?! They don't go rotten :)
do it yourself
CrazyDIYmom.com Contact Us Privacy Policy Disclaimer About me