
DIY handheld hummingbird feeder
This post may contain affiliate links.
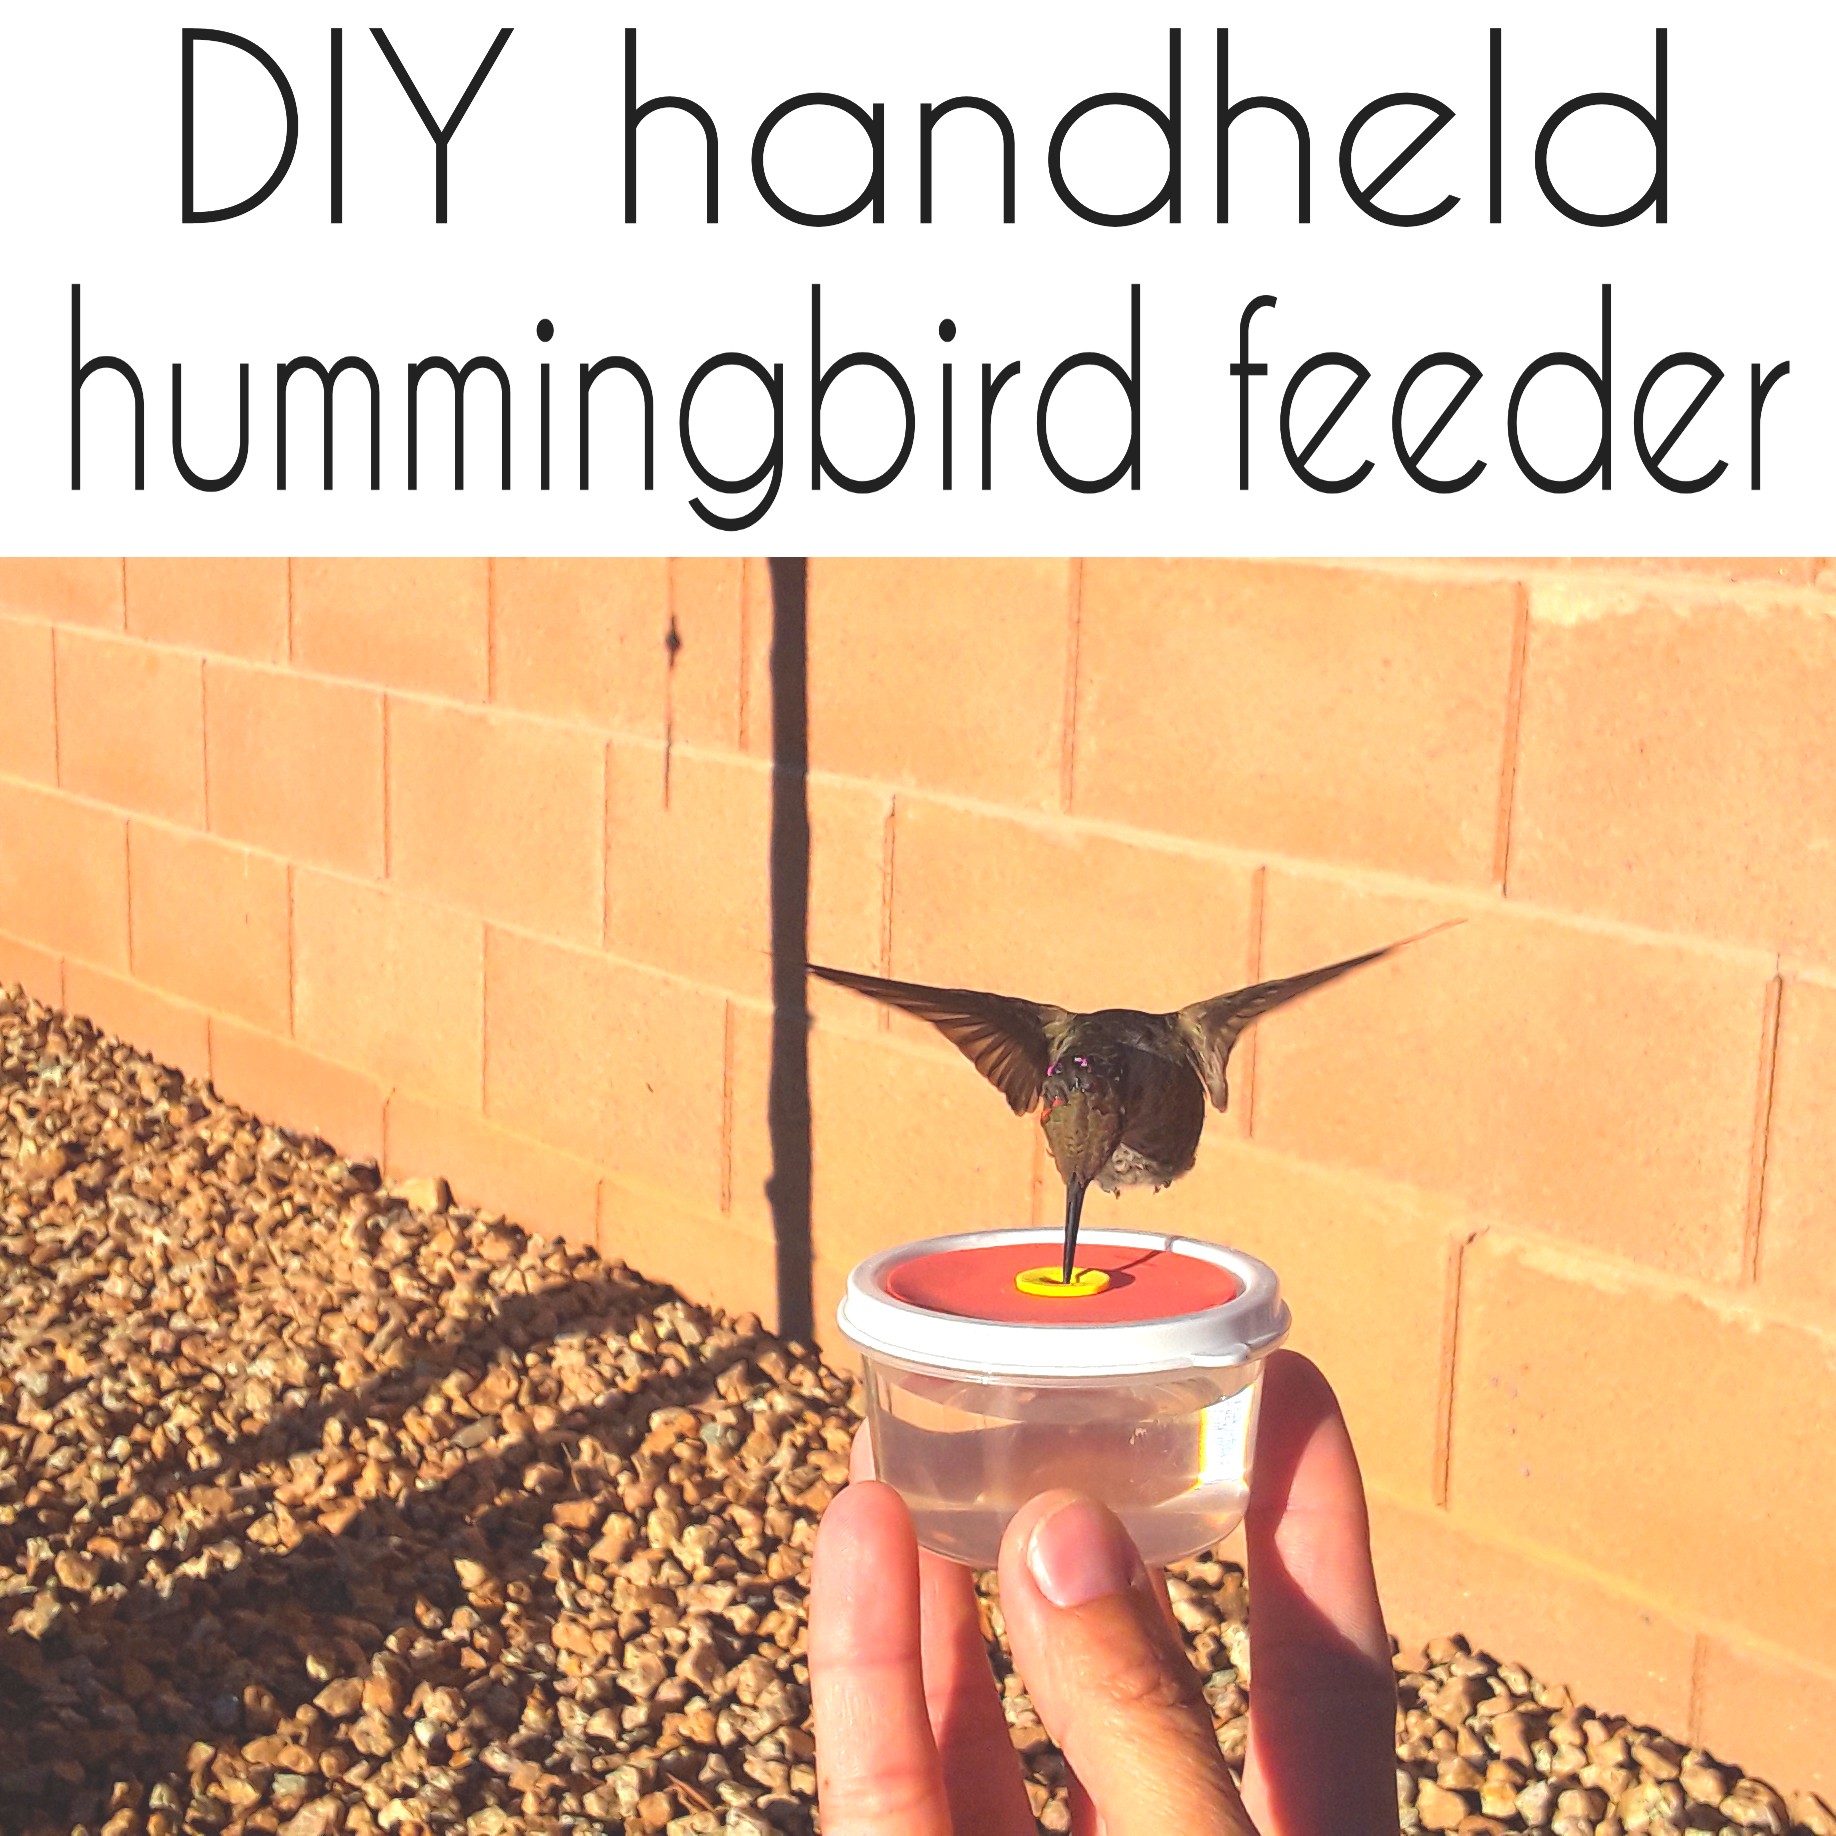
You guys, I LOVE hummingbirds! They are by far my favorite bird ever (except of course besides our African grey timneh Sidney). Here in Arizona we see them pretty much all year long and they are very quick to get your attention if their food is running low. My kids also have a love of animals and have oftentimes held the feeder in their hands in hopes the hummingbirds would feed right in front of them. And they do! But those big feeders can be hard to hold, so we decided to make our own.
What you will need:
small little plastic containers with a lid
some red and yellow craft foam
hole puncher/scissors/utility knife
glue (I always use this glue)
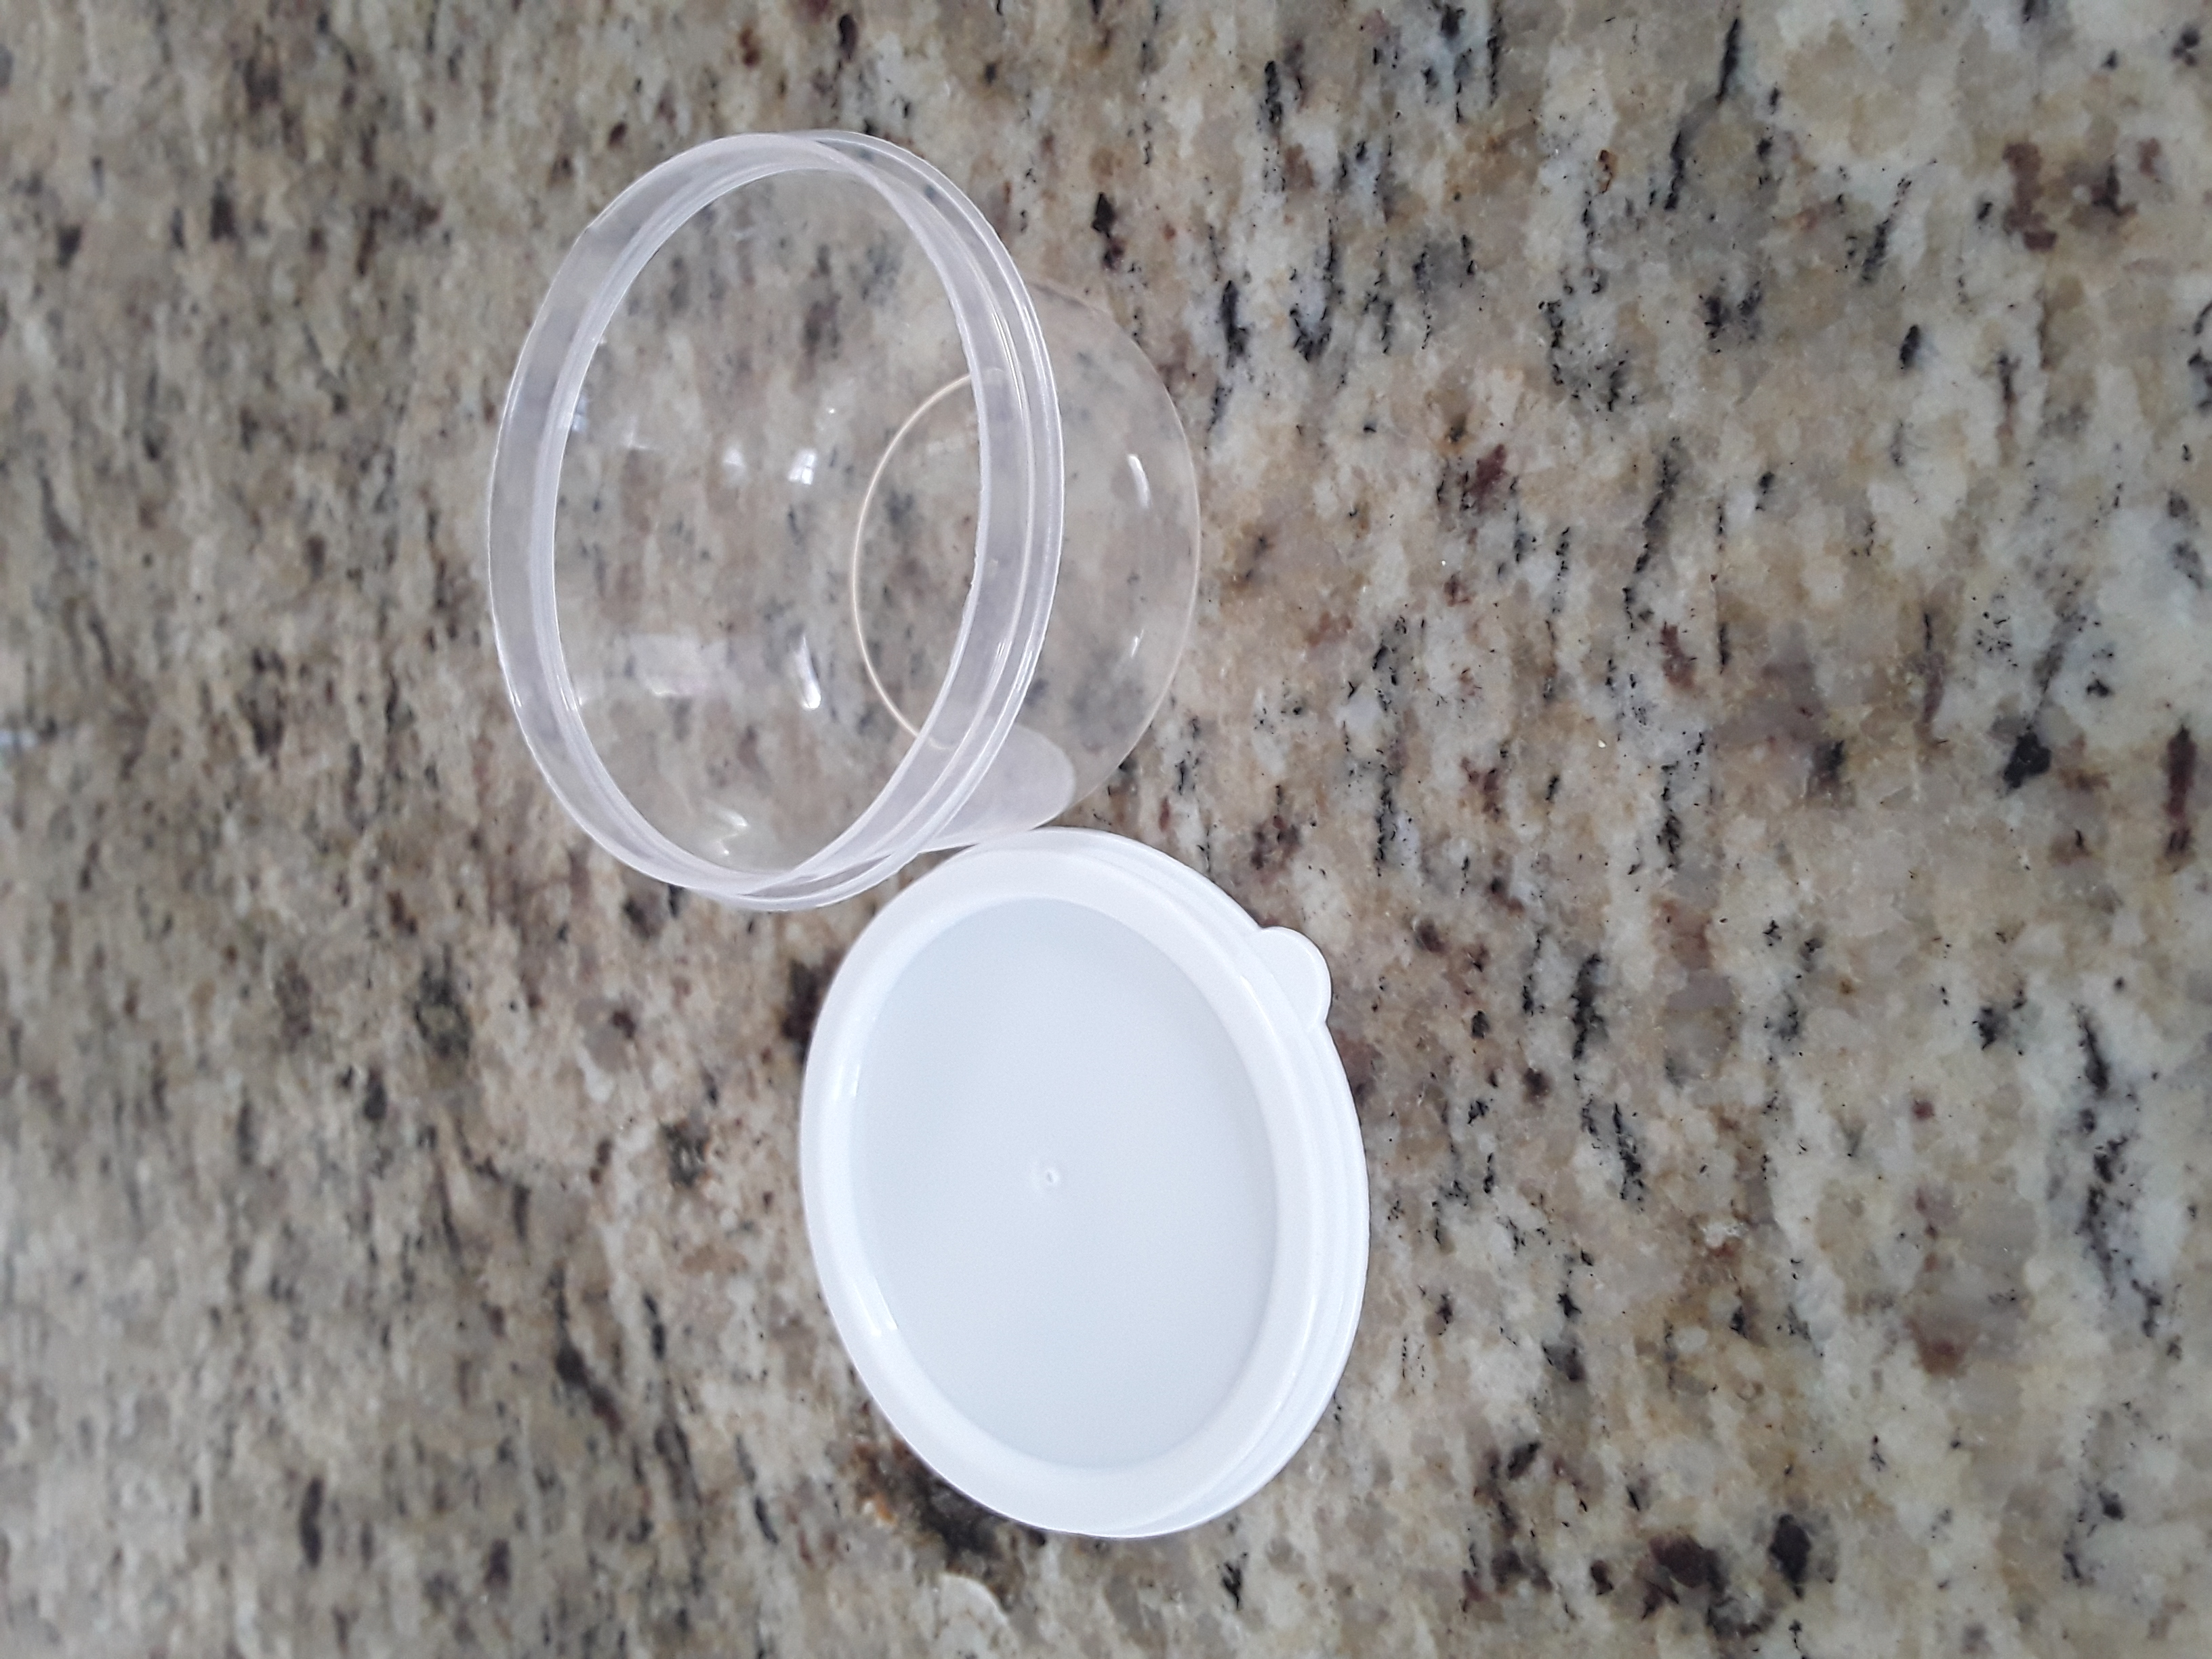
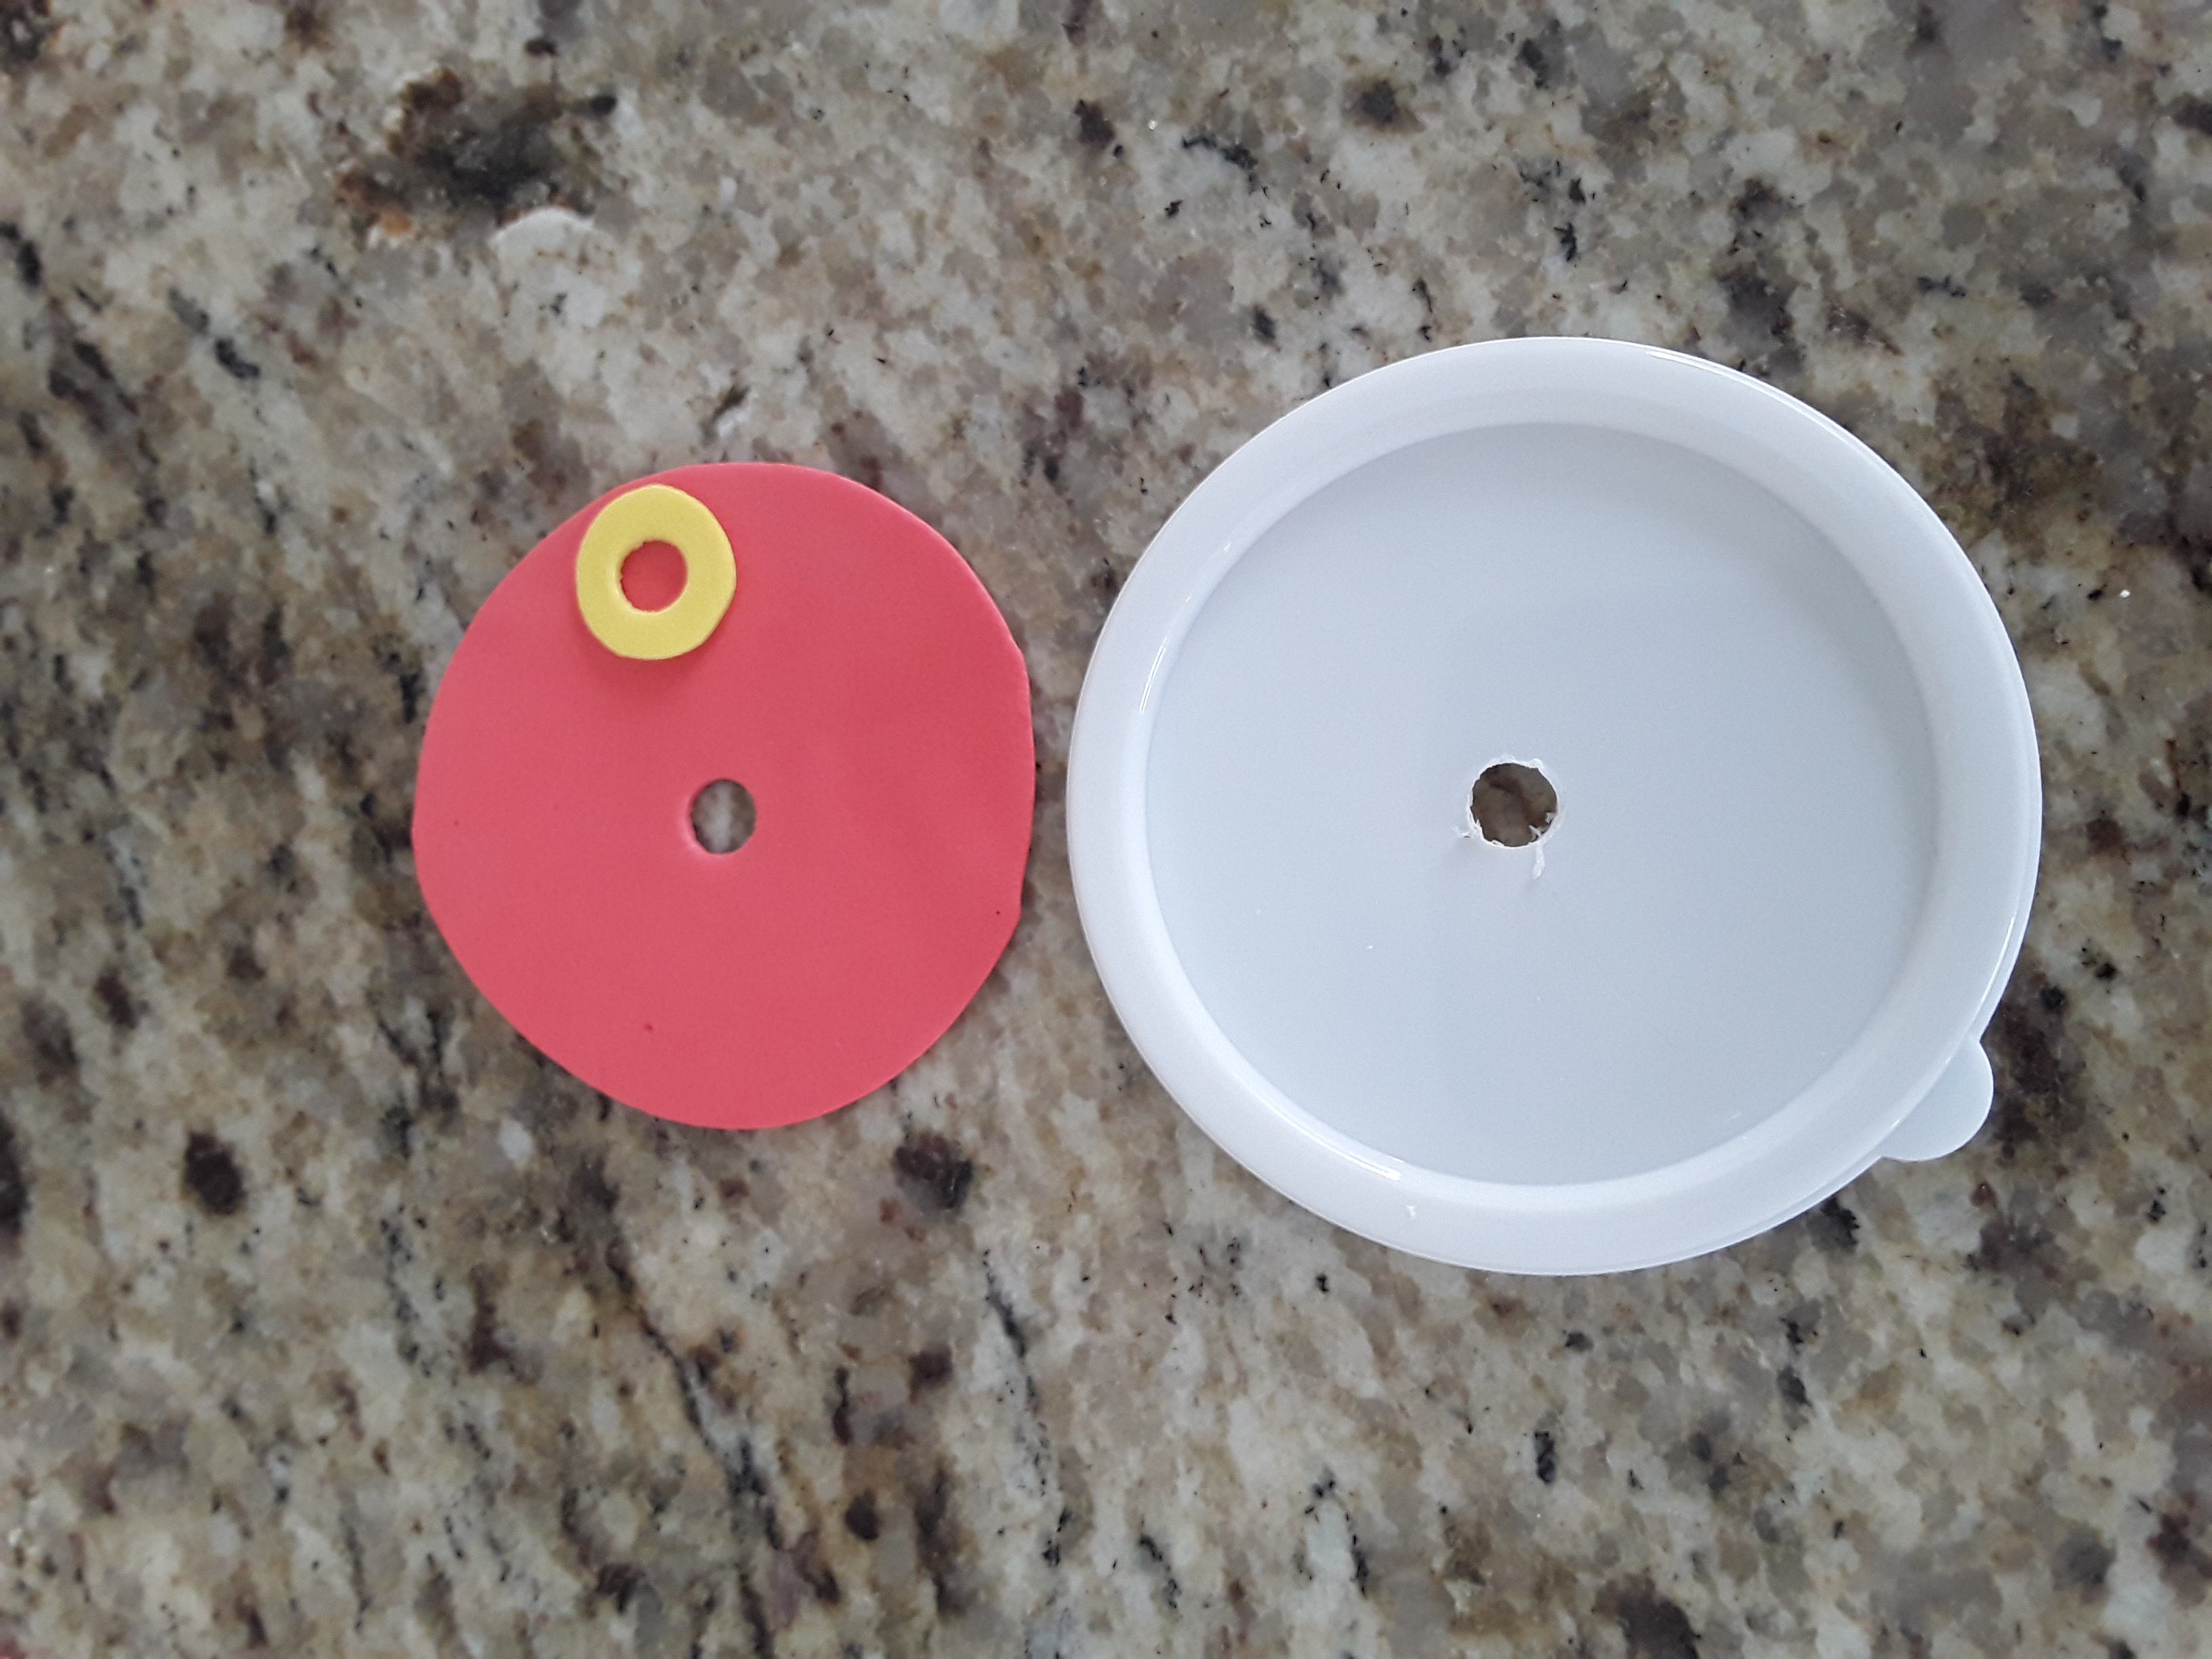
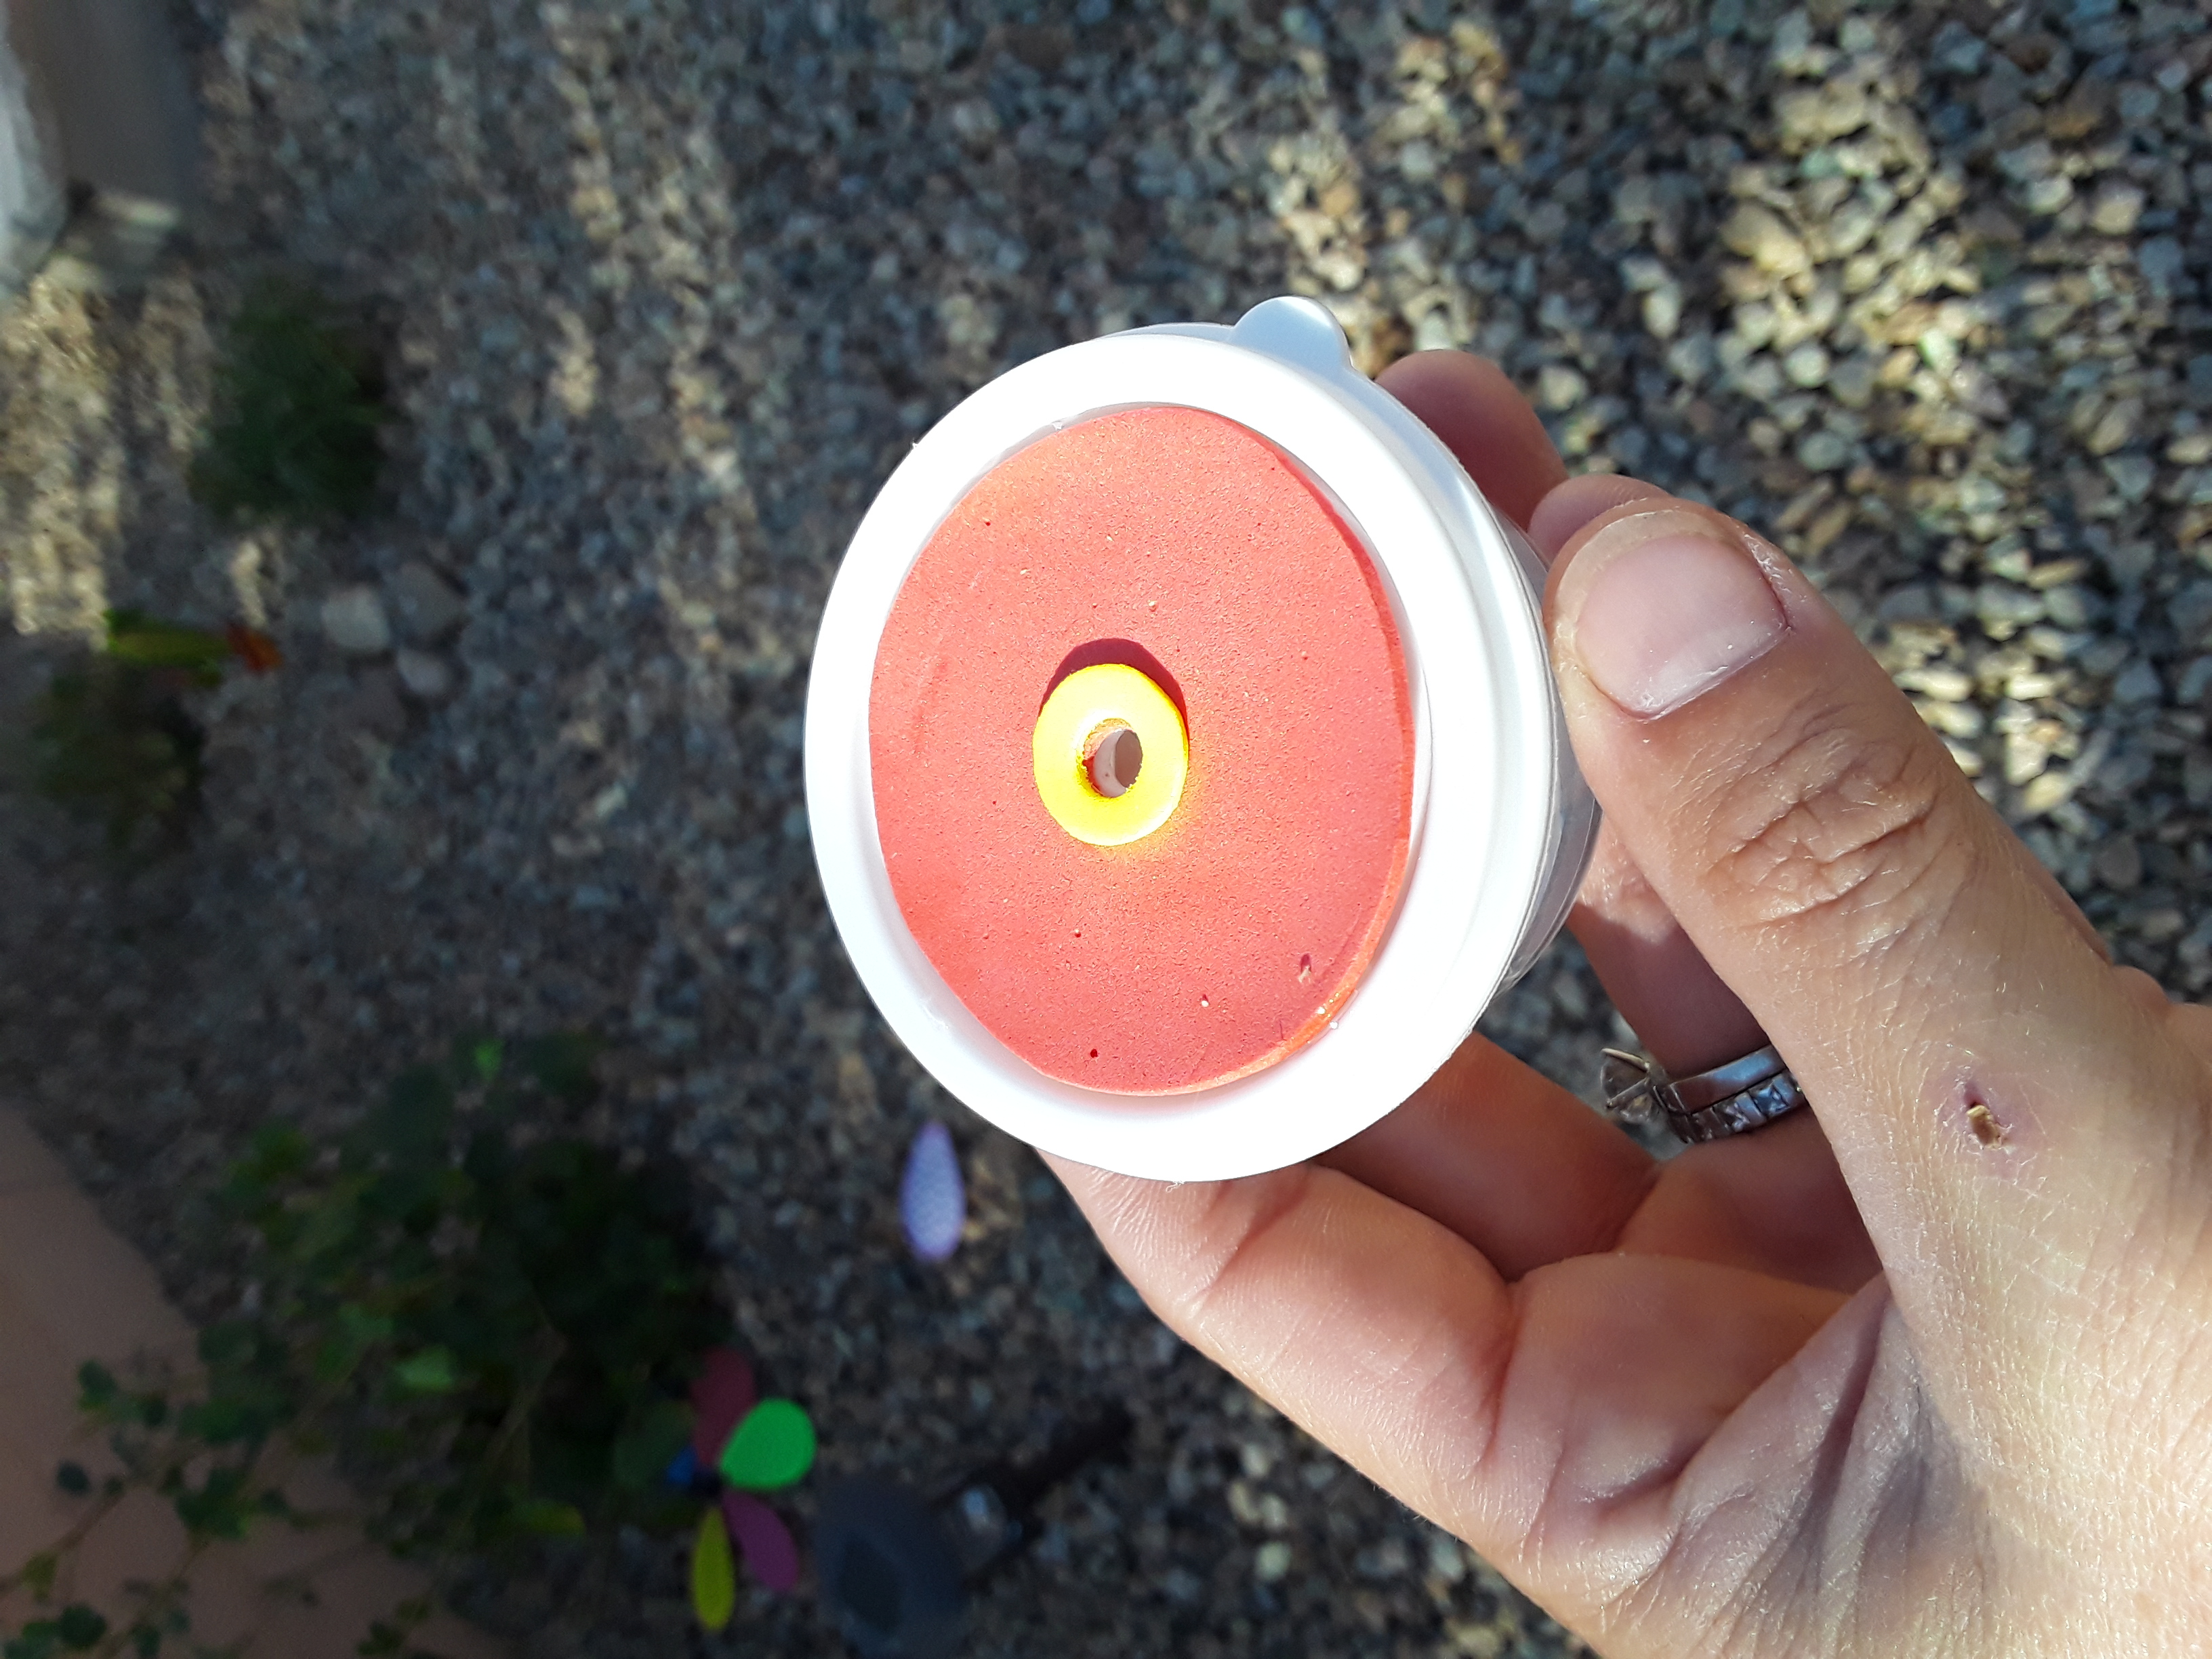
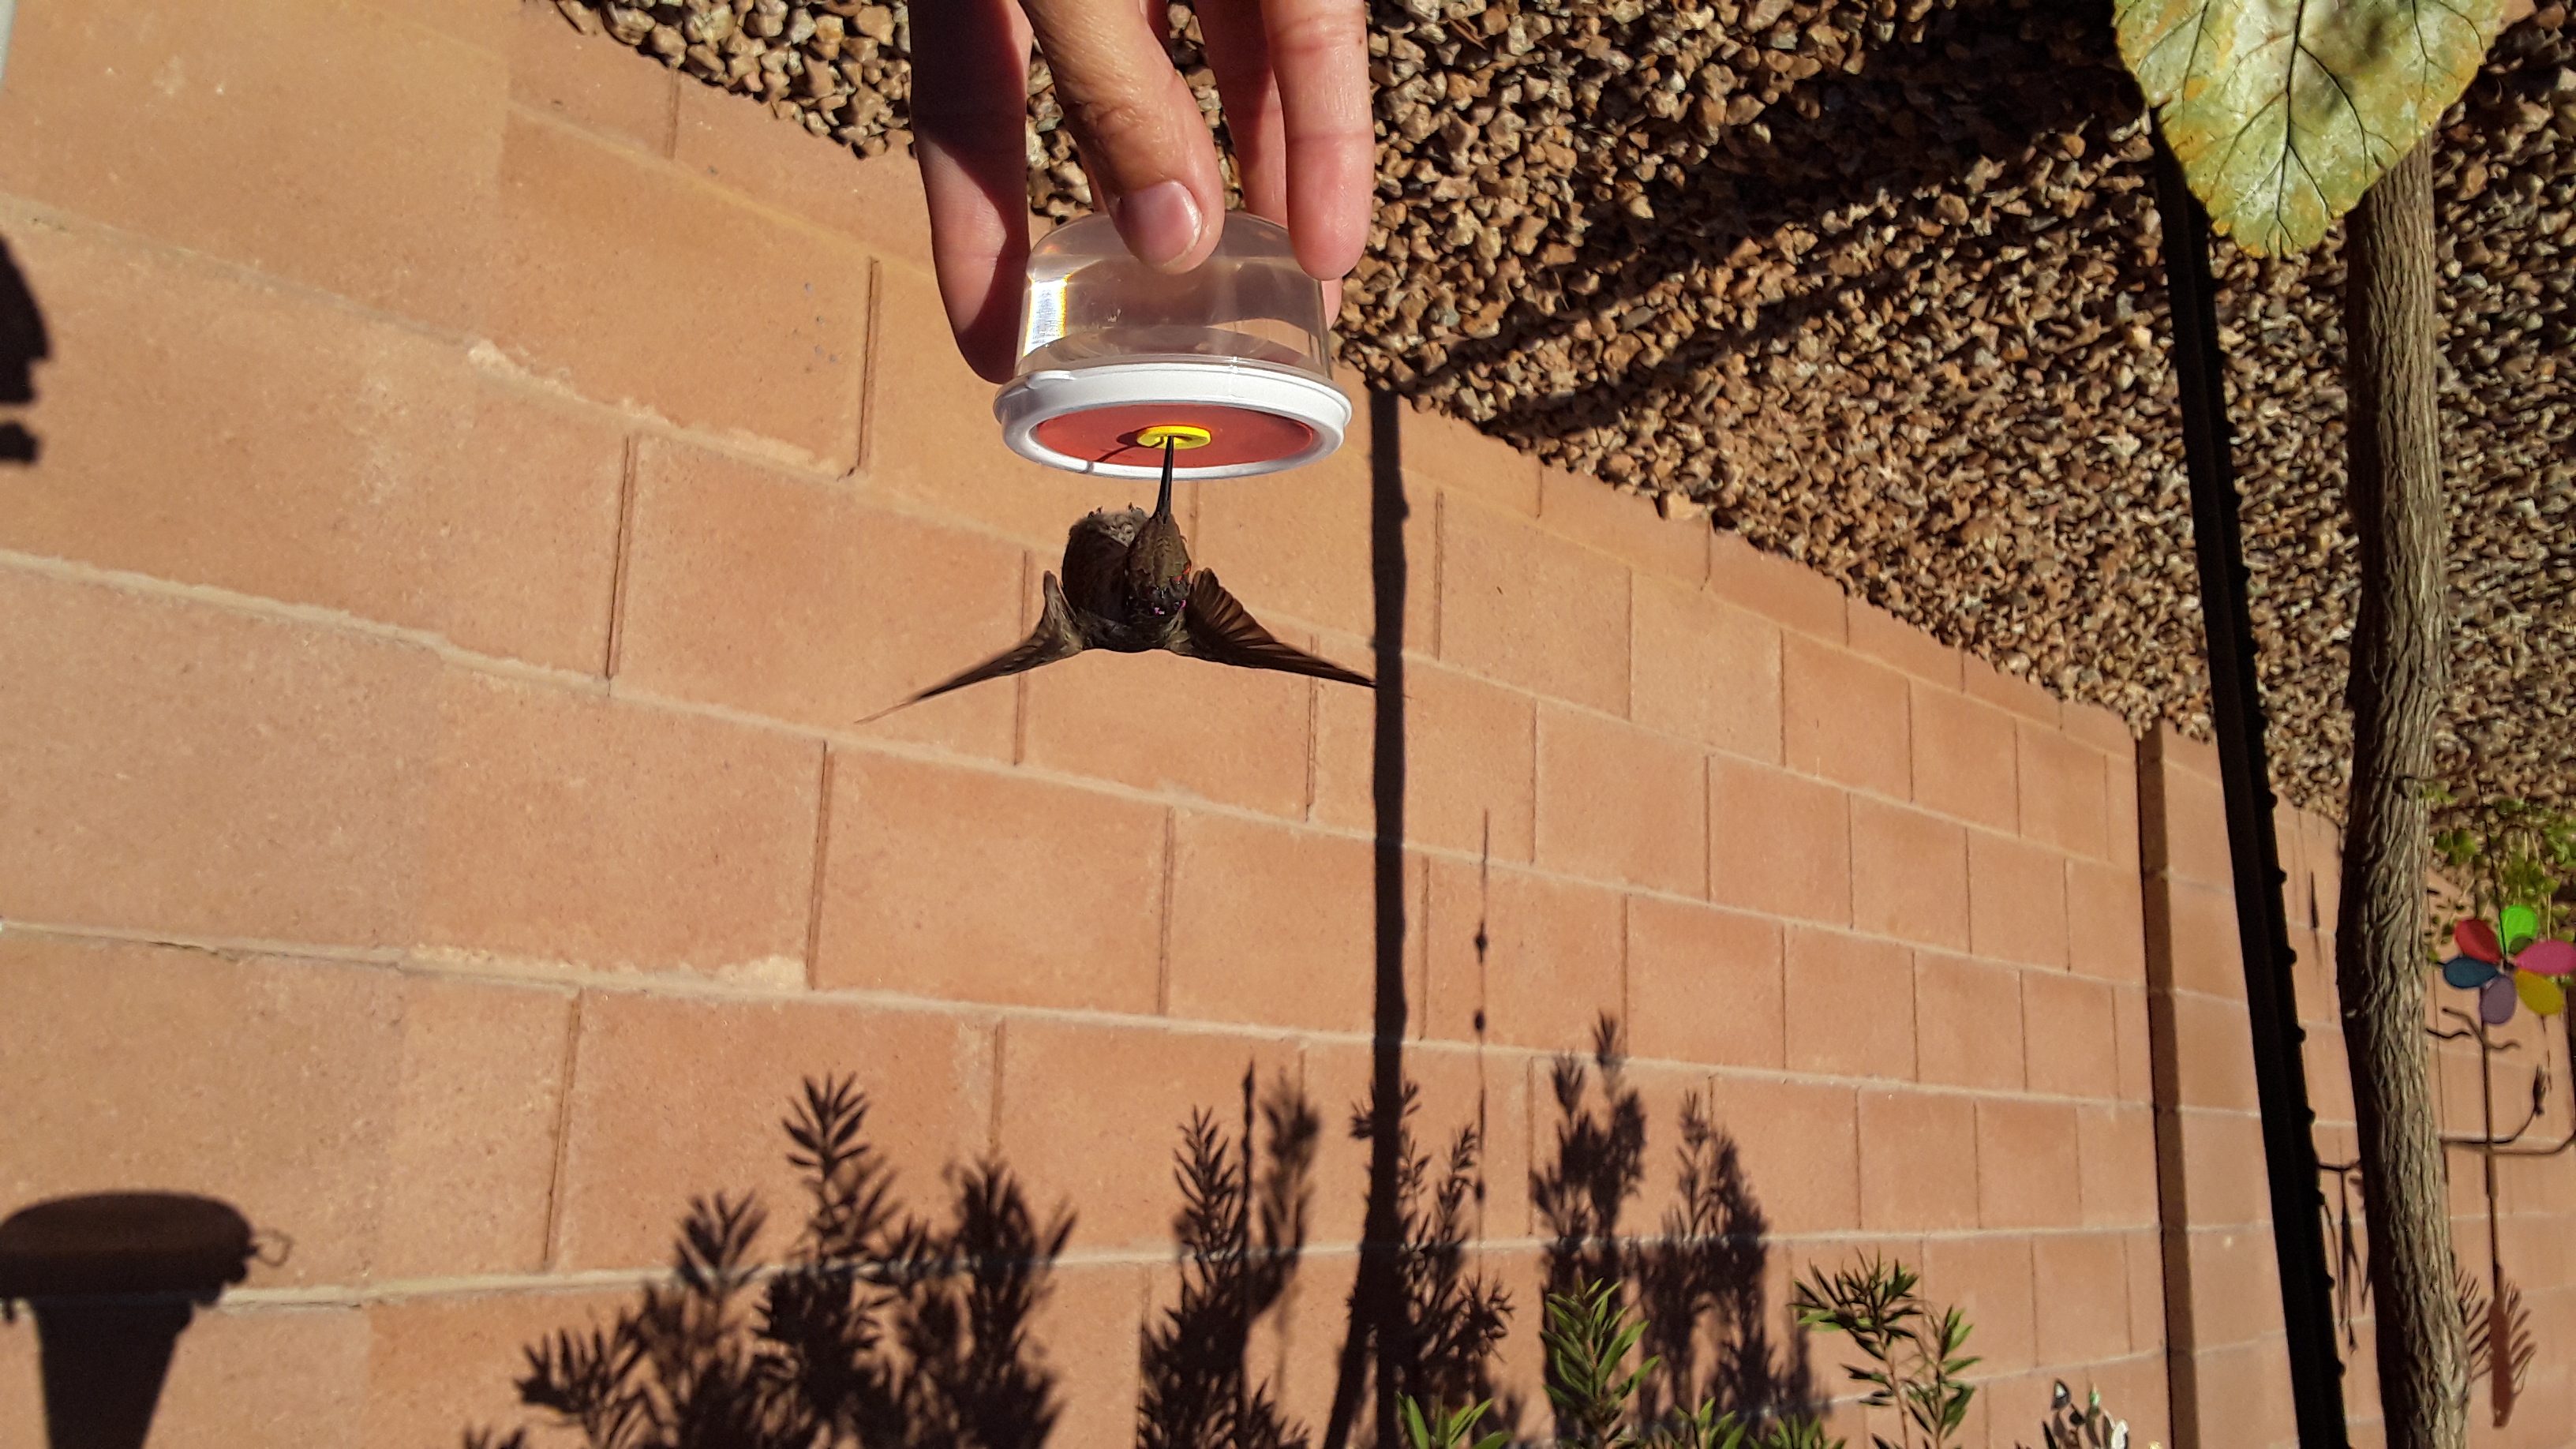
Start by washing your little container to make sure it's clean. I got a pack of 10 or so from the dollar store and they were the perfect size. Then using the lid as a guide, cut out your red foam to fit on top of the lid. Take your yellow foam and cut out a smaller circle, about the size of a dime. Use your hole punch (or scissors or knife) to cut a hole in the middle of the lid, the red and the yellow foam and then glue them all on top of each other as pictured.
Then prepare your food if you don't already have some. Make a mix of 1 cup boiling water to 1/4 cup of sugar. Dissolve the sugar and wait for it to cool before adding it to your containers.
Then take your feeder outside and have patience. We let it sit out near the other hummingbird feeders for a bit so they would get used to it. But soon after a little hummingbird came for food at the regular feeder he spotted my new hand held feeder and wanted to try it out!
diy hummingbird feeder
Want more DIY's?CrazyDIYmom.com Contact Us Privacy Policy Disclaimer About me